Not everyone in the house, and even more so in the apartment, has a fireplace. And sometimes you want to create a festive mood (so that where to put gifts) or just want to make the room more comfortable and chamber. In this case, you can create an imitation. The simplest option is a cardboard fireplace. Usually use packing boxes from a large technique.
Cardboard false fireplace: models
A false fireplace made of cardboard, like a real one, can be wall and corner. In both versions, the portal can be straight or arched. As you like more. If we talk about the practical side of things, the straight line is easier to do, it is easier to finish. Even a beginner can handle it.
What could be a cardboard fireplace
A wall fireplace is great if there is a decent free section of the wall. It looks great in the wall between the windows. If the walls are all occupied, but there are corners, you can build an angular model.
How to choose a cardboard?
The quality and appearance will depend on the material and type of cardboard boxes. If you take the packaging from under the TV, the "false fireplace" will be narrow without much indentation in the place where the burning firewood is. Therefore, wide boxes are most often used, at least 50 centimeters in depth. It is also desirable to use the most durable cardboard, in this case, you can make a wooden stand on top.
Choose sturdy cardboard
If you want to make a more complex design, it is recommended to prepare 2 more boxes of different sizes. This will expand the possibilities for a creative idea. Still it is worth making sure that drawings are easily applied to paper. They should be clearly visible, because in case of an error, you will have to look for new material.

Sophisticated multi-box design
Often used 3 types of "false", namely:
- Christmas with New Year decorations.
- Corner hearth.
- Standard wall.
For each of them, it is necessary to select a certain amount of materials and types of cardboard boxes. To make the structure more stable and reliable, you can put a wooden frame inside. This will be relevant in the family in which young children grow.

back to menu ↑
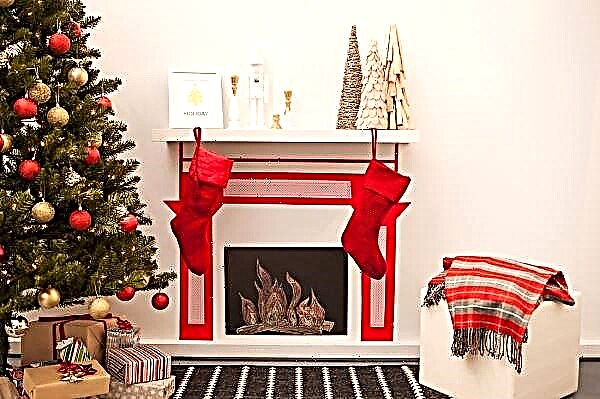
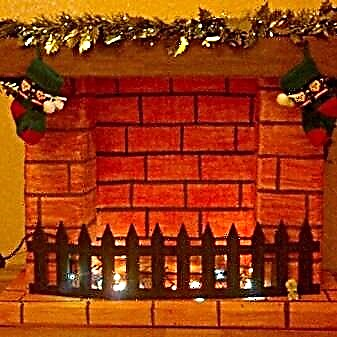
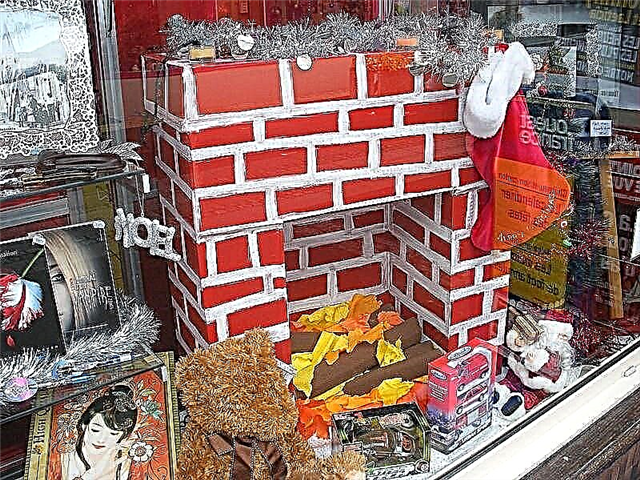
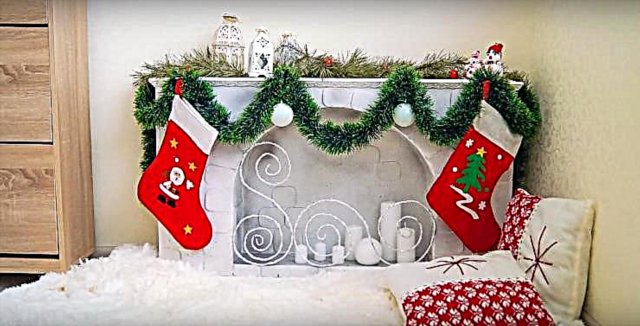
How to make in honor of the Christmas holidays?
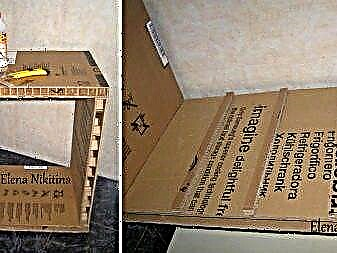
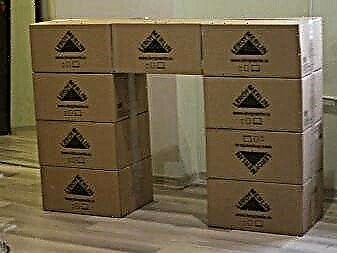
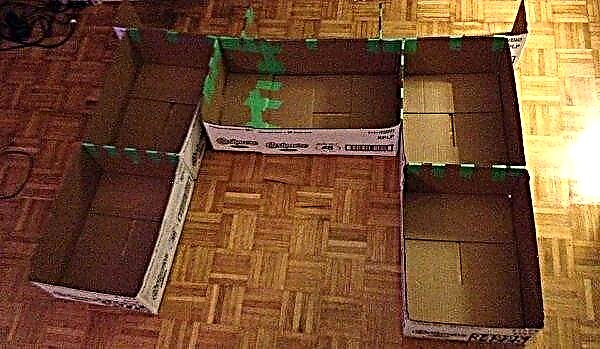
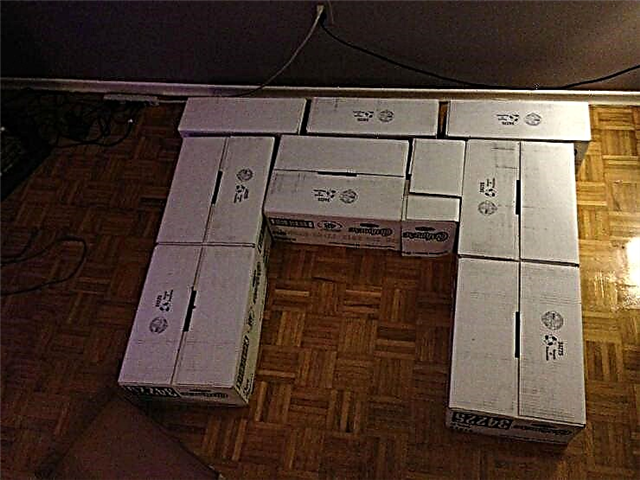
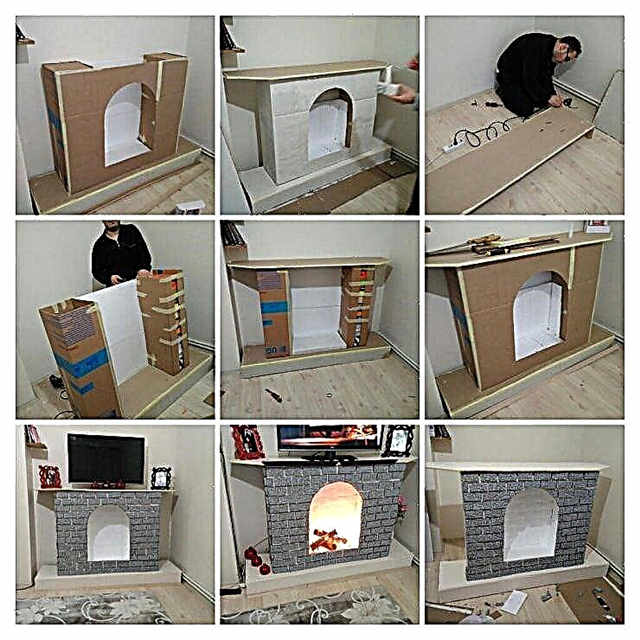
To make a Christmas hearth, you need only 3 cardboard boxes, one of them should be large and the other 2 smaller, but the same. The first is set in the center, and the other at the edges. Further, objects are glued with tape or reliable glue.

Creating a frame for the future fireplace
If there are no boxes of the same height in the house, they are cut. At the same time, the upper part should not have dips.
The room where the fireplace will be installed, it is advisable to use the same where the spruce will be located, this will create more comfort and a festive atmosphere.
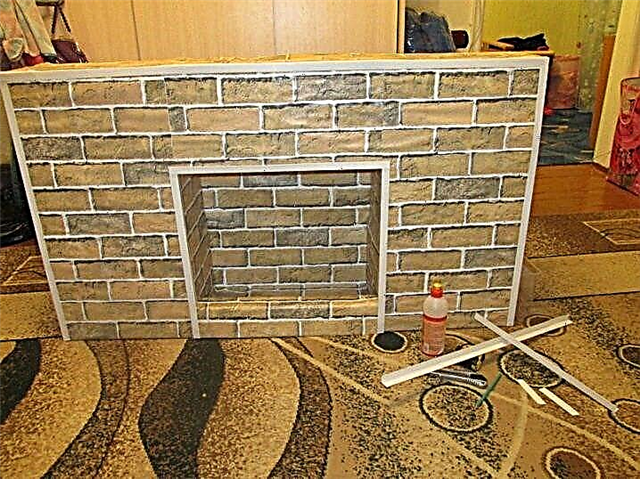
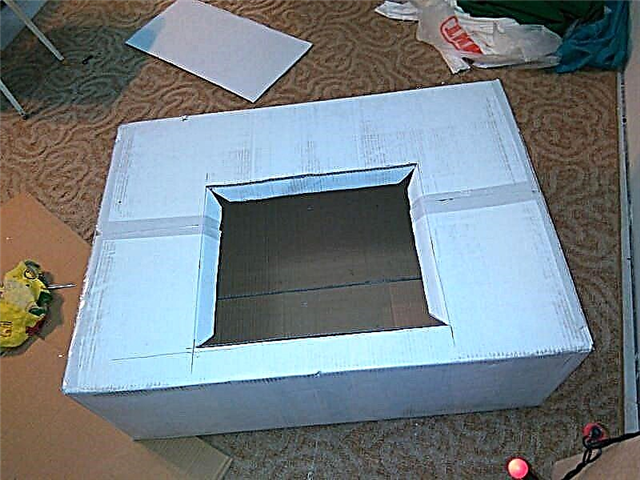
The first thing to do is to remove the front of the wall from the large box, which is located in the middle, there will be a furnace hole. The fireplace can be put on a pre-prepared border, so it will look much more spectacular.

Fireplace border
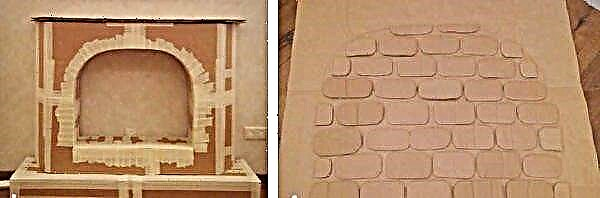
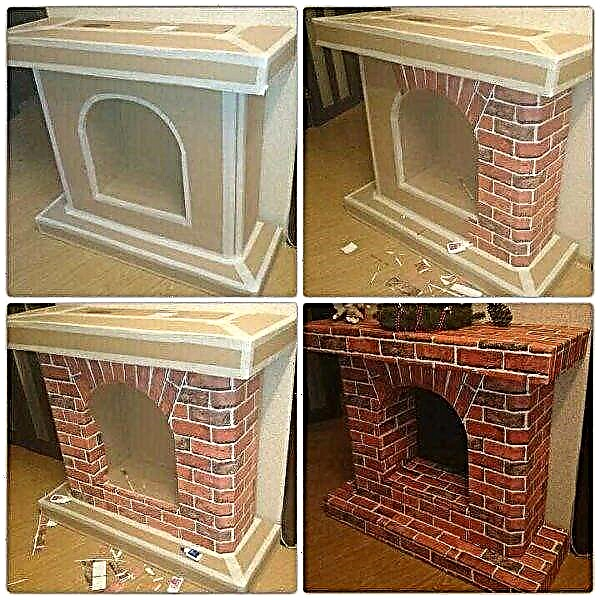
If you want to make artificial bricks, you can use thin foam. You need to mark it and cut out rectangular figures, the size is slightly smaller than a standard brick (if the size allows, you can use the original dimensions of the stone).

DIY brick
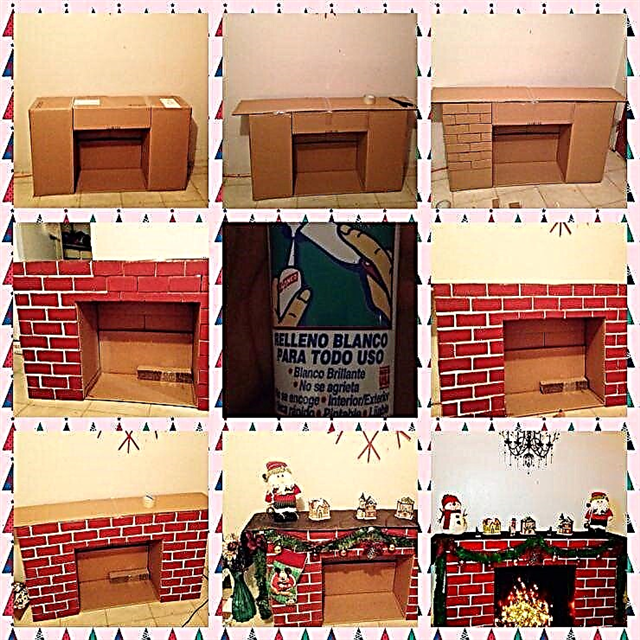
Now you can start gluing the foam. Bricks must be staggered so that the masonry is as close as possible to the present. After the work done, the glue should harden, only after that the work can continue.
Gluing Styrofoam to Fireplace
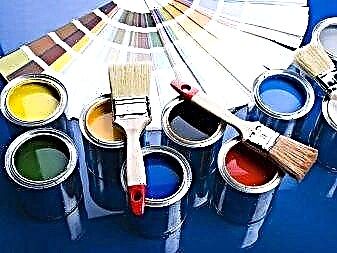
Now you can start painting. It is desirable to prime in several layers so that all parts have the same color. The border is usually painted yellow, and the bricks are red or golden. If the owner wants to make a hearth not only for the New Year holidays, you can buy brown paint.
back to menu ↑
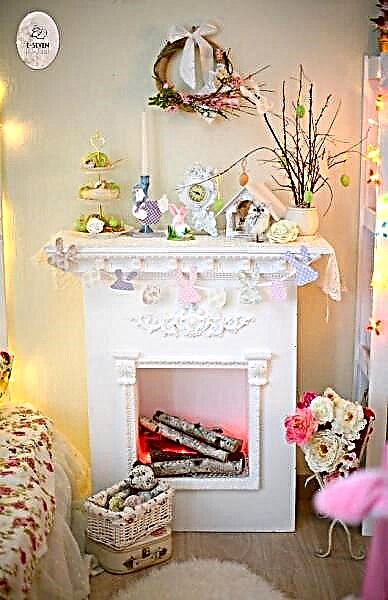
How to decorate a New Year's fireplace?
To decorate the Christmas hearth, various toys and natural materials are used, for example:
- Branches ate.
- Bumps.
- Balls.
- The rain.
- Christmas socks for gifts.
- Fruit.
- Candies.
- Bells.
- Figures of Santa Claus and Snow Maiden.
- Snowflakes made of paper.
- Garlands with backlight.
Toys and decorations for the Christmas hearth
Appropriate colors must be applied. It is recommended to use decorations of green, red, golden, blue or white color, as well as their shades.
back to menu ↑
Features
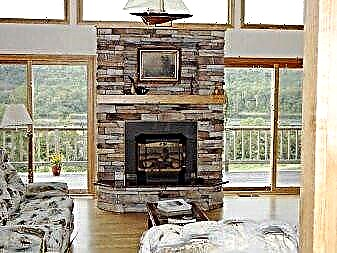
In private households, a fireplace is often installed. Such a product is usually located in the central part of the house. Such an original model will decorate any room; installing it will contribute to creating a comfortable atmosphere. Particularly interesting are items decorated with bright garlands, toys and candles for the New Year or for the Christmas holidays. The fireplace in the house in many countries is considered an object symbolizing happiness in the family.
In modern apartments, it is difficult to install a real fireplace, therefore, to make a dream come true, you can make a cardboard product yourself, besides, in its beauty, a fake fireplace will not yield to a real item. It is possible to build and deliver a product from cardboard in any, even the smallest room.

A decorative fireplace, of course, will attract the attention of visitors, so you should put it in the most convenient place for this for better viewing. The product will look very organic, especially if you install it between the windows.

Often, decorative products are installed in shared rooms, such as living rooms, dining rooms, no less organically they will look like fireplaces in the bedroom. When making them, it is worthwhile to understand that this product should fit the general style of the room. Such designs are unlikely to be appropriate in rooms made in the style of hi-tech or modern.
A self-made fireplace should complement an already created design, contribute to the improvement of the chosen style. In the process of manufacturing and decoration, you can create unique designs and come up with unusual attributes.
It is unlikely to make a fire in a decorative fireplace; its task is only a decorative function. To make the flame more realistic, instead of the usual fire, you can put candles in the depth of the fireplace or connect an electric garland. Fake fireplaces made of cardboard practically do not differ from real products made of brick.
Advantages of cardboard fake fireplaces:
- products have a very original and beautiful appearance,
- able to give the room sophistication,
- they are placed in any place convenient for this,
- DIY construction of such structures can make you feel like an experienced designer,
- for the construction of such a fireplace does not require large material expenses,
- the ability to quickly disassemble such a product if necessary.
The disadvantages of these designs include:
- The unreliability of the structure. For the manufacture of products, soft materials are taken, such as cardboard, paper, so the product may become deformed over time.
- In false fires it is impossible to make a real fire, therefore such a product will have only a decorative function and will not create heat in the room.
- For the construction of the structure should spend several days on its manufacture and decoration.

Style and Design
Before starting work on the manufacture of cardboard structures, it is worthwhile to carry out preparatory work. You should determine the installation location of the product. For this, a wall without furniture or a corner of a room is more suitable. To determine the size of the structure, it is worth calculating it right at the installation site. A model or dummy for future construction will allow you to determine the size of the product and choose a decor for it.
Do-it-yourself fireplace can be made in any size, choosing the optimal length and width for this, while taking into account the style of the room. Falshkin should harmoniously fit into the interior of any room. Do not allow the product to clutter up most of the room or not harmonize with the furniture. In addition, you should take into account the size of the product and not make it too small if there is bulky furniture in the room. The fireplace should complement the overall picture and make the room more interesting, and not drown it out or introduce dissonance.
When choosing a finish for a product, it is important to consider that it should be decorated the most carefully, otherwise flaws may remain, which will reduce the effect of the work done. To end up with an interesting and original product, you can draw unusual and interesting ideas from experienced designers or design a fireplace based on your preferences.
Necessary tools and accessories
When making a cardboard structure with your own hands, you need to prepare working tools and materials that may be needed in the process.
It is good if at home there is a large cardboard box from under office equipment or furniture. It is enough for the manufacture of the conceived model. If there was no big box, then for work you can take smaller shoe boxes. If you don’t store unnecessary things at home, you can simply buy boxes. An interesting fireplace model can be made from mailboxes for parcels.


In addition to the boxes, you should prepare:
- clerical knife
- scissors,
- glue like PVA and any mounting glue for working with decorative elements,
- masking, double-sided and regular tape,
- water-based paint.
In addition to the basic tools, you will also need additional ones that can be used both in the process of work and when decorating the product:
- roulette,
- ruler
- pencil,
- paper napkins,
- foam tiles
- different types of paints
- varnish
- Simple or decorative wallpaper.


During operation, sponges and dry rags will be useful. For decor, you can purchase various parts, such as moldings, columns, stucco products. All these materials and decorative items can be bought at a construction and office supply store.

To make the fireplace look real, to build an imitation of fire, it is necessary to decompose the firewood, placing a device with blinking lights under them. Thanks to such illumination, the impression will be made that a real fireplace is burning in the room.
In addition, a column connected to a device can be integrated into the decorative structure. Such a device will create sounds that simulate the crackling of combustible firewood. When the light is off with a sound and lighting source connected to the fireplace, an unusually cozy and fabulous atmosphere will be created. It will be very interesting to look at the grill mounted on the front of the product.
The acquisition of parts and materials depends on which model of construction is conceived. Decorative items can be purchased at the store or independently made decorative details for a false fireplace.
How to do it yourself?
Once you have decided on the materials and tools, you should draw a plan with detailed measurements. Step-by-step instructions will greatly simplify the process of making a fireplace from cardboard.
Making a cardboard structure is a simple matter, if you approach the work responsibly. Each master has his own secrets for manufacturing the product, so you should familiarize yourself with the workflow by watching several options on the video or visiting a master class, where you can plunge into the working atmosphere in more detail.

Even the simplest manufacturing option should consist of the following steps:
- you must select the type of product, determine the shape and place for it,
- choose materials for the manufacture of the frame and subsequent finishing,
- prepare the necessary tools and materials,
- mark the details on cardboard,
- cut out all the parts, glue them and install the structure,
- to finish the product
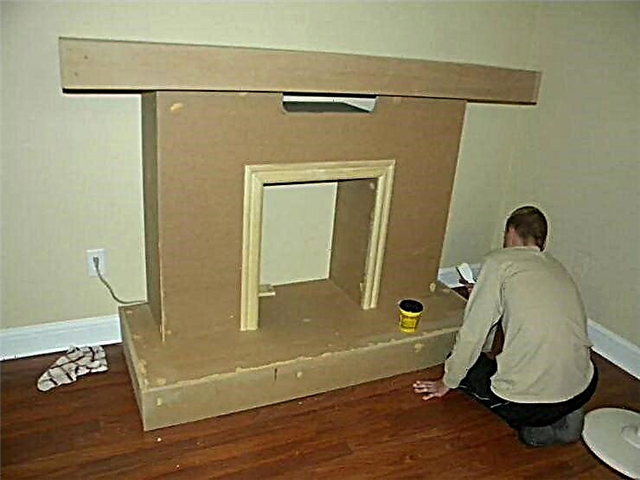
Consider the option where a large cardboard box is taken as the basis for manufacturing. From such a box you will get a rectangular product. When choosing a size, experts recommend focusing on the height of the product about 90 cm with a width of 80-90 cm. The size of the fireplace can be different, it depends on the preferences of the master manufacturer. In addition, you can often see models much higher, wider and deeper than standard sizes, and some of them can be equipped with decorative chimneys and supports and shelves.
In the manufacture of the product, we first make the central part, then we begin to form columns. The main thing is to correctly measure and bend the parts in the right places. In order for the columns to be even, you can take a ruler or other durable object, and by pressing on the cardboard, bend it. After preparing the parts, they are pasted over and painted. To glue parts, use masking tape, with it, parts are glued on both sides. In order to make the structure more durable, it is recommended to glue an additional partition on the walls.
At this stage, the bulk of the work is completed. Next, you should work on painting the product and decorate the fireplace. Since adhesive tape was used for gluing cardboard, it should be hidden so that its traces are not visible. To do this, you can take a large sheet of white paper and glue it over the entire surface or apply a primer to the model, and only after priming paint the product.


After drying, the paint proceeds to decorate the fireplace. Such work can be approached creatively and made parts for decoration from different materials. You can simply glue the surface with wallpaper that mimics the brickwork, or make bricks with your own hands from cardboard, polystyrene or other materials.
If cardboard is chosen to simulate a brick, it should be painted with white or colored aqueous emulsion ink. After drying, to give the brickwork a texture, the most ordinary paper napkins are glued to the walls of the finished product, which are then coated with PVA glue. After the surface dries, the impression will be that real bricks were used to decorate the fireplace.

Suitable for product design and self-adhesive paper, from which forms are cut in the form of bricks and lay them on the surface according to a specific pattern.
To simulate masonry, you can use polystyrene, from which details are cut that will serve as bricks for decorating the fireplace. Foam figures are glued with PVA glue to the surface of the fireplace, then the places where there are defects are smeared, after which water-based paint is applied. When making a product, moldings and other decorative elements are often used, and corners are glued.
Product Assembly:
- Having a drawing in hand, you can collect all the details. The design of a decorative fireplace made of cardboard consists of its base and portal.
- For the base, a rectangular shape of the product is selected, which is glued with adhesive tape. The cardboard is compacted, for this, several pieces are glued together. Now the structure will not bend.
- The base of the structure should be 7 cm more than the thickness of the fireplace, and its length 10 cm should be greater than the width.
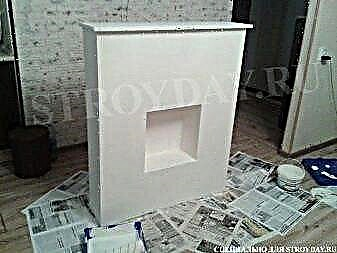
- For the portal and the front, it is better to take a solid sheet of cardboard. Inside the sheet, cut out the middle, which will be a firebox. Using adhesive tape, the side walls are attached to the rear wall.
- Parts should be connected to each other.
- After all the details of the fireplace are glued together, it is time for decoration.The entire structure should be coated with white emulsion paint. Stitches and joints are thoroughly stained.

- If desired, you can leave a white fireplace or make an imitation of brickwork.
- After drying, the entire structure is coated with colorless varnish. Varnished surfaces will be less contaminated. Such products are easier to clean, they are not afraid of moisture, moreover, they look more spectacular than without varnish.
- The finished product is installed in its permanent place and decorated with candles, tinsel, decorative products.
If you haven’t found a big box at home, but there are shoe boxes, you can use them. It is better to pick up a few pieces with the same size. To work, you should tape the bottom of the box with tape and connect several identical elements together

Decorative fireplaces for rooms more often have:
- Near the wall. Wall structures are placed near the wall, while the facade of the product will protrude forward at a certain distance.
- Corner option. Place the product in the corner of the room.
- Built-in design. Such a product is mounted directly into the wall.
- Island. Such a false fireplace is placed in the center of the room.
Each author of his product can make it of various materials, of various shapes and in any style. The main thing is that the product is combined with the decor of the room, in harmony with the selected interior. The product will look very beautiful in a room decorated in a classic or English style. For rooms decorated in an art deco style, models with curls and original patterns are suitable. If the room is decorated in a rustic style, it’s nice to make a fireplace with a rectangular firebox or in the form of an arch. It is important to make a fireplace that will complement the overall style of the room and fit perfectly into the design of the room.
If there are children in the house, you should take them as assistants. Students can be entrusted with the construction of the simplest model of a false fireplace. The kids will be delighted and happy to build a toy decorative fireplace.
For the manufacture of a toy fireplace you will need the same materials and tools, but the dimensions of the product should be made small to facilitate the process. Drawing up a plan and drawing, preparing material and cutting out the details will be possible for older students. Young children can help while decorating the model by applying glue or carving bricks for the fireplace.
The least difficult option is where the fireplace is made in the form of the letter "P". This design can be gradually supplemented with various decorative elements.

Material
When choosing a material to simulate a real fireplace, you can choose not only cardboard. You can make a product from plywood, foam tiles, drywall. But the cardboard fireplace is the easiest to make, and it looks very beautiful after decoration. The main thing in working with cardboard is to do everything correctly and scrupulously, otherwise instead of a beautiful product you can get a crooked cardboard house. In order to make the material more rigid, an additional layer of cardboard is glued on the load-bearing sides of the product.
To glue the surface, it is worth choosing construction tape or paper paper for gluing windows. You can take ordinary tape, but it is suitable if it is planned to wallpaper the surface. When painting the product on ordinary scotch tape, the paint may not lie down evenly.
During assembly of the structure, you can use corners - with their help you can make the corners of the product much more even. You can not pull them out after assembly, they will not be visible, but such a product will become more durable.

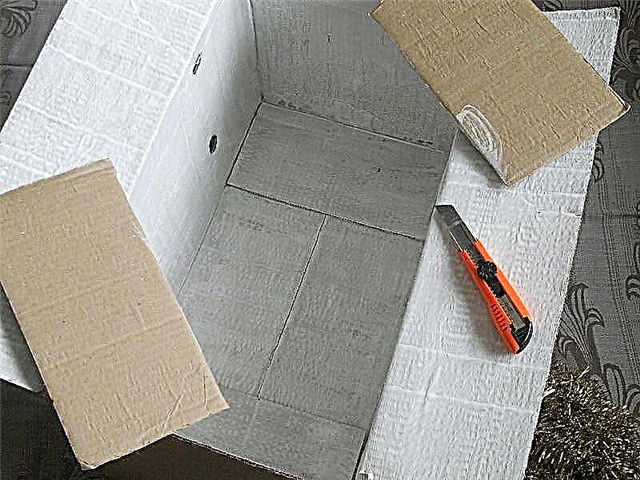
Since the product is assembled from parts, the internal parts should be processed before the assembly process. To do this, they are laid out on the floor, painted or pasted over. This is especially true for the furnace, since getting to it for processing is much more difficult when folded. If the hole for it is small, it will be much easier to finish it before assembling the product.
But the external sides of the structure should be made ready-made. In addition, if it is planned to paint the product, the surface should be primed beforehand, so it will be possible to hide traces of adhesive tape.

Dimensions
To determine what size is needed for the fireplace, it is worthwhile to think in advance about the place where it will be and determine how well this model fits into the room. It is also worth seeing what materials and boxes are available. If you have a large box, you can build one type of structure, and having several small shoe boxes, the design can be completely different.


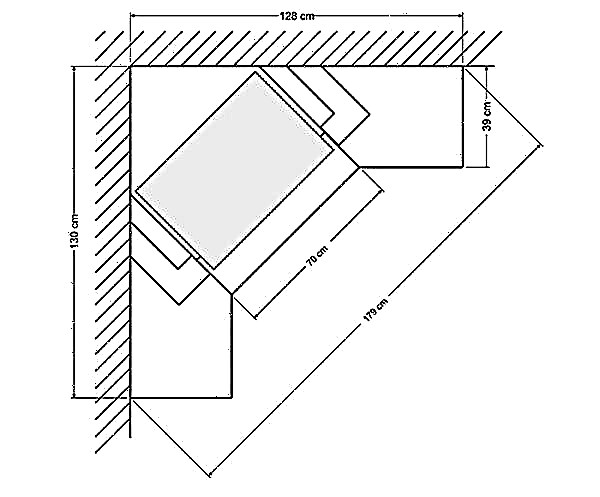
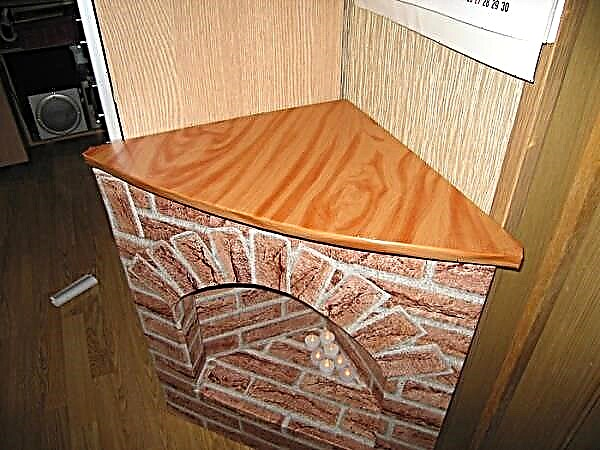
Drawing of a corner raised fireplace
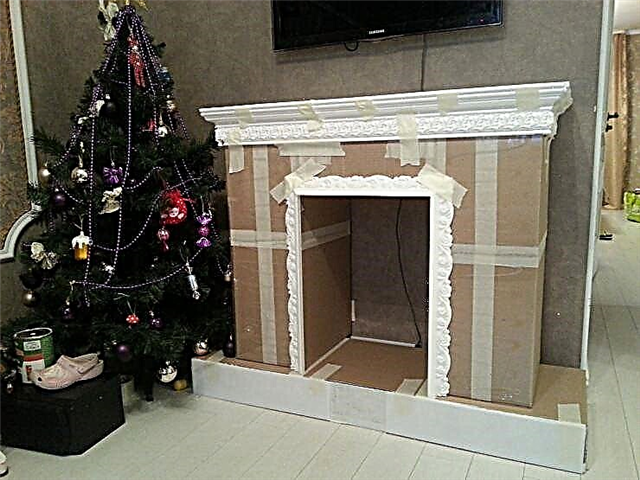
More often decorative items are placed in common rooms so that everyone has the opportunity to spend free time around them. A fireplace decorated with New Year attributes will immediately add a festive atmosphere to the room. If you put a Christmas tree nearby and spread out gifts, such a room with a decorative fireplace will become the most beautiful and cozy place to spend time with family, friends and relatives.
Dimensions of decorative fireplaces should correspond to the size of the room. For small rooms, you can choose a standard size structure, and for a large spacious room it’s worth building a fireplace with sizes from 1.5 to 2 meters.


Colors
When choosing a color for a decorative product, you should pay attention to white products, as well as models in the design of which the colors of natural materials were used as brick, stone, or choose the color of the product at your discretion.
Since the fireplace should organically fit into the design of the room and harmonize with the furniture, the color of the product should also fit into the overall color palette of the room. The border for it can be painted in dark cherry tones, and for painting bricks it is worth using red or golden colors.

Often, themed wallpapers are chosen to decorate the walls of the fireplace. Often for such products use canvas with a pattern in the form of a brick wall. For the New Year holidays, you can choose a wallpaper with a pattern of deers and New Year's paraphernalia. Although fireplaces with deer and Santa Claus in the warm season can look a little off topic.
To make the design look more interesting, it is worth adding additional effects. Since there is no way to make a real fire in a cardboard fireplace, you can make an imitation of fire.
There are several ways to do this:
- Using candles. They are placed in the original candlesticks and placed in the back of the fireplace.
- You can take dry fuel. This method is only suitable for short-term use.
- Using photo wallpaper. They are glued to the rear wall of the structure. It is worth choosing an interesting picture that would have good print quality.
- During installation, built-in electric lights or other electrical appliances that will simulate the flame in the fireplace.

To complement the effect of naturalness, you can put tree branches, logs in the fireplace. Such decor will complement the overall picture, in addition, a light woody smell will add a special festive touch of mood.
Tips & Tricks
- Creating designs from cardboard, it is better to take universal guides from metal for a covering. Such a strong frame will guarantee a long service life.
- For cladding, you can use tiles under natural stone. A stone mosaic will look very interesting and original.
- You can make fake fire using red light bulbs.
To finish a decorative product, you should choose one of the methods:
- You can paint the walls of the fireplace. Before applying the paint, the surface should be puttied and cleaned with sandpaper.
- Use a self-adhesive film. Before sticking the film, the surface is putty and cleaned.
- Facing with artificial stone. This cladding will look very interesting and elegant.
- To finish with plaster. Often, plaster is used in the manufacture, thanks to this material it is possible to imitate a surface of brick or stone.
- Decorate with ceramic tiles. In order to keep the tile well on the surface, use a reinforced plaster mesh.
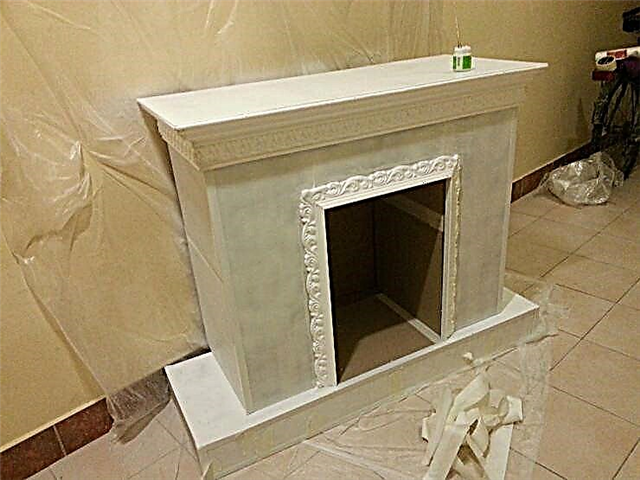
- Use stucco molding. For fireplace decor, you can take polyurethane stucco, which is best fixed to the surface using mounting glue.
Good examples and options
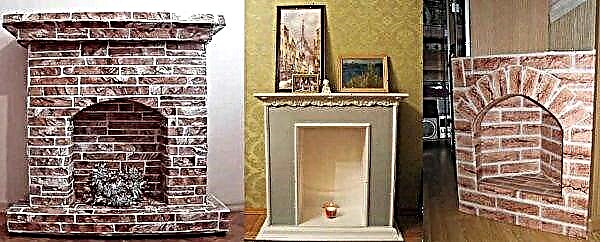
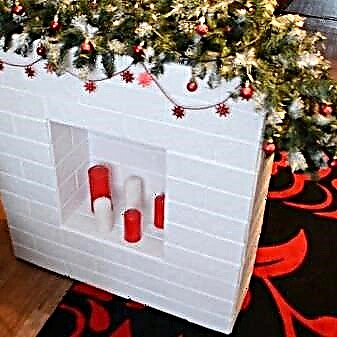
If there is no experience in building a decorative fireplace from cardboard yet, you can start with the simplest models. Such a fireplace is best placed in a small room.

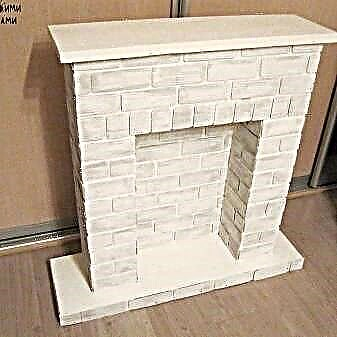
A white cardboard fireplace on the eve of the New Year holidays will contribute to the festive atmosphere.

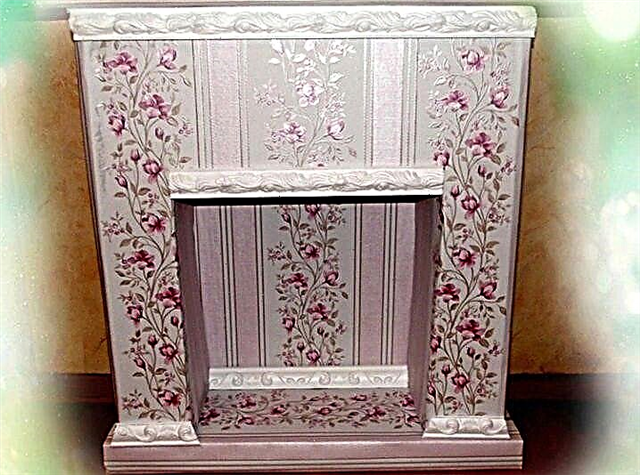
A fake fireplace from a cardboard box, pasted over with wallpaper, looks very original and cute.
Creating a fireplace from the boxes.


Simple fireplace design with grill.
How to make a fireplace with your own hands, see the video below.
What materials are needed
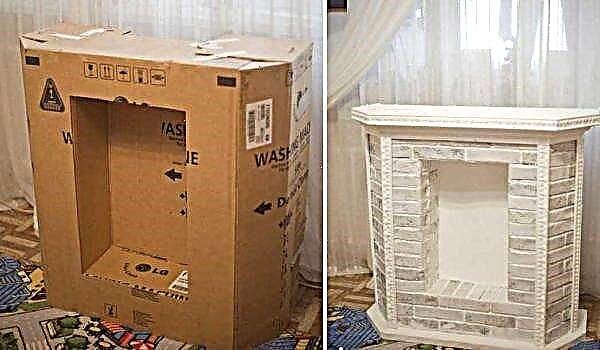
The best material is cardboard boxes. It is easiest to make a fireplace out of cardboard if there is a box from under a large monitor or TV. All you need is to cut out the portal and glue the side walls.

Can be made from a large cardboard box or some small
A little more work will be if there are only small boxes such as shoe boxes. But from them it is possible to assemble a more interesting model in form.
Still need will be:
- scissors,
- stationery knife,
- PVA glue,
- paper (masking) tape.
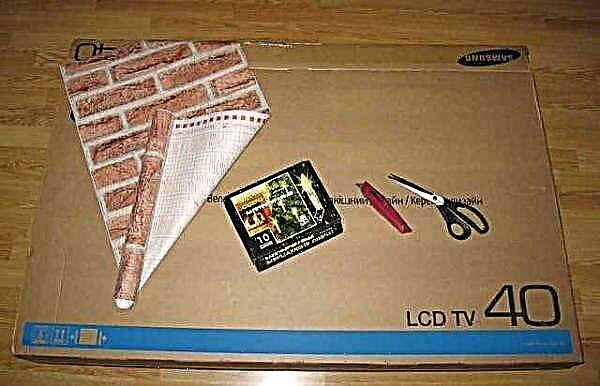
That's almost all it takes to make a fake cardboard cardboard
These are all the materials and tools that are required. From the entire list of questions, questions can arise only regarding adhesive tape. Why paper? It is good for any finish. Including when staining. So the option is universal. If you are not going to paint the fireplace, you can use ordinary adhesive tape.
We will also need finishing material, but we'll talk about this later, since much depends on the method of decoration.
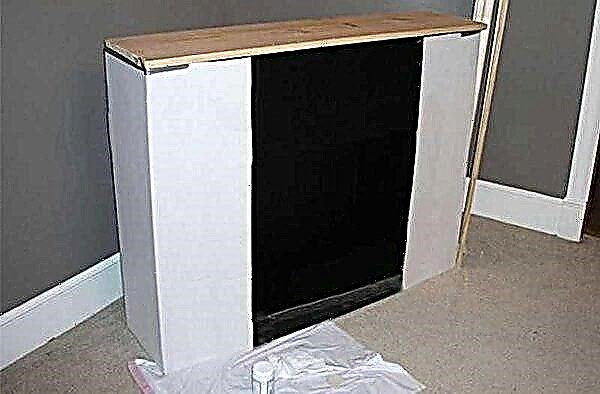
If there is a big box
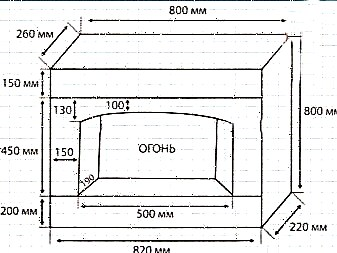
From a large cardboard box you get a fireplace with a rectangular portal. Determine the size yourself, but the optimal height is about 80-90 cm, the width is about the same, the depth is 6-15 cm, but there are models that are wider, and narrower, higher and lower. Everything to your taste. For example, a drawing of a cardboard false fireplace with dimensions.

Fireplace drawing from a cardboard box
We begin to collect the imitation of the fireplace from cardboard from the central part. The first to form columns. Cutting rectangles to size is not a problem. The problem is to make even folds in the right places. We take a large ruler or flat bar and a solid object with a rounded end. A ballpoint pen is suitable, for example, you can take a spoon or fork and use a pen. The idea is as follows - along the line where the fold should be, apply a ruler / bar, draw the back of a ballpoint pen or cutlery handle along the bar, pushing through the cardboard. But watch carefully, do not tear. The sheet bends easily along the drawn line.

Cardboard fireplace parts
We glue the central part or paint immediately. Then it will be too uncomfortable. You can paint in black, as in the photo. Another option is to imitate brickwork. Looks good too.
It is convenient to glue the parts together with adhesive tape (the type of adhesive tape has already been discussed). We glue each connection on both sides. We do not regret Scotch. This cardboard fireplace was painted, because the columns were pasted over with thick white paper. You can use a primer, and apply paint on it.
We turn off the shelf above the fireplace from several pieces of cardboard using the same technology. If you plan to put something, it is advisable to make stiffeners - several partitions. If the whole structure is solid and stable, you can make a shelf from a piece of plywood, for example.
If the cardboard is thin, polystyrene / foam can be used. It is sold in hardware stores. You can take the plates that go to finish the ceiling. They have processed edges, a drawing is applied to the front surface. In general, it may turn out interesting.
Next up is the finish. In this embodiment, “bricks” were cut from paper of a suitable color. They designed the portal opening. Here you need PVA glue. Do not forget to leave seams between the "bricks". In the presented model, they are painted in the base color, but you can make them, for example, black, white.

The rest of the false skin surface is painted, and foam (polystyrene) moldings are glued on top.

That's what happened
Moldings can be glued before painting. Cut them with a sharp clerical knife. Then the cut will be even. It is glued to PVA or special glue. Wipe off the residuals immediately, otherwise the paint will lie unevenly.
The same design can be pasted over with wallpaper “under a brick” or wild stone. Self-adhesive film is also suitable. But you need to work with it carefully - it will not work to peel off.
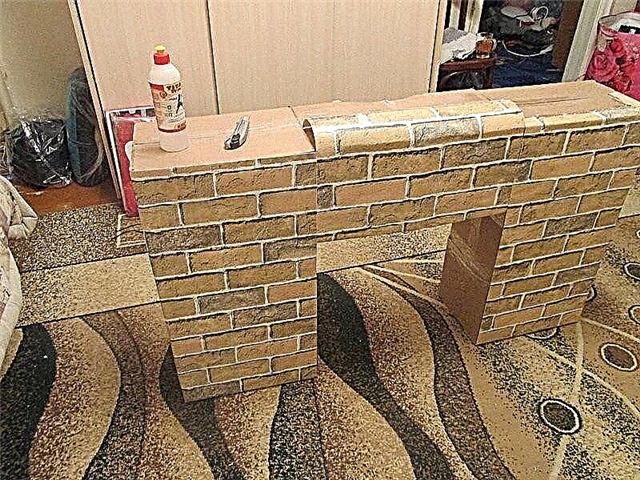
If the boxes are small
Small cardboard boxes are no more difficult to work with. They can be the same or different size, thickness and width. Based on the available kit assemble the design.

Here is the fireplace made from the existing cardboard boxes
- Seal the opening part of the boxes with tape, then glue them together. Glue can use PVA. It is good to press the glued boxes together, leave for 8-12 hours to dry the glue.
- Cut off the opening part, and glue them together with pieces of adhesive tape.
Glue the boxes with tape on the back
The second option takes less time, but the design is unreliable. With large dimensions, it can sag, bend.

With trimmed covers, the design is shaky
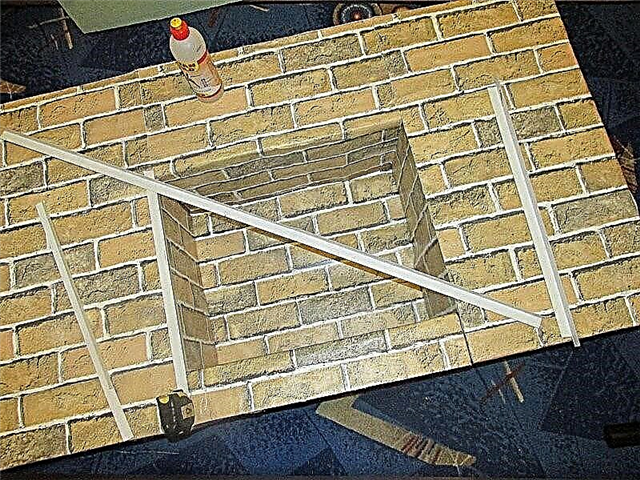
To give a fireplace from cardboard boxes a presentable appearance, we will paint it “brick-like”. To do this, glue the surface with dense greyish-brown paper. This color will be the background.
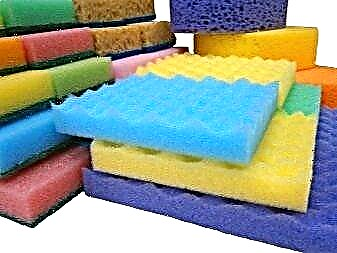
For painting, you need a reddish-brown paint and a large foam sponge. It can be cut to the size of a brick - 250 * 65 mm. Pour the paint into a flat bowl, dip a sponge into it, applying it to the paper and pressing it lightly, we draw the bricks.

When working, it is necessary to ensure that the "seams" between the "bricks" are the same width. This is not an easy task - a little distraction, and the size is not the same. You can do it easier - cut masking tape into narrow strips, stick it, draw “bricks”. After the paint has dried, remove the adhesive tape.

Here is a cardboard fireplace
The upper part had to be reduced, because our fireplace was too shaky. It’s better to use whole boxes.
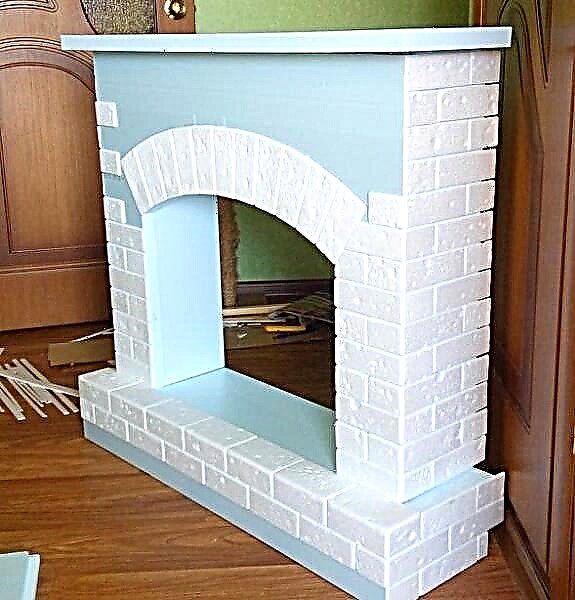
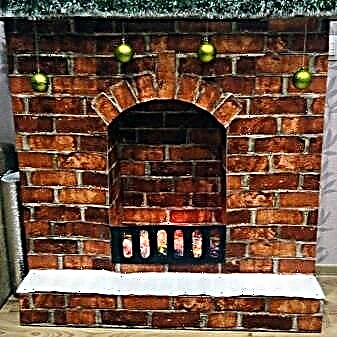
Round portal fireplace
Its assembly is more laborious: you will have to glue the arch well. For this fireplace, 4 large boxes (like from a TV) were required.

Drawing of a fireplace made of cardboard with dimensions
Separately glued the base. On the inside of the polystyrene glued stiffeners. The weight turned out to be solid and the base bent without gain. The strips were installed after about 5 cm. They were glued to masking tape, then the base was glued on all sides.
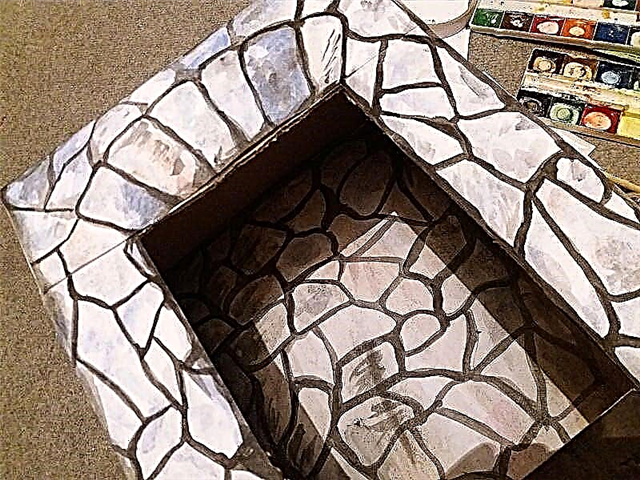
Then the front part was cut out and the back wall was designed. It is better to decorate it right away until it is glued together. Transfer the arched cutout to a sheet of cardboard. We cut out “bricks” from cardboard and glue them so that the edges do not extend beyond the “arch”. When the glue dries, collect the main part of the portal. We also install several stiffeners in the portal - with a high height, the cardboard can “play”, and everything turns out firmly and rigidly.
The process of making a fireplace from cardboard
The next step is the manufacture of the cover. It is multilayer - cardboard, polystyrene foam, cardboard. Everything is oiled with glue, the load is installed. When the glue dried (after 14 hours), the lid was fixed to the structure with tape. FURTHER - finishing work.
To smooth out the bumps from the tape, we glue all the surfaces with thick white paper.You can take sheets of A4 format, you can - a larger size.
Next, you need a roll of paper towels and PVA glue. We dilute it 1: 1 with water, pour into a spray bottle. Wet the napkin, lay it, squeezing a little. Wet thin paper itself gives a relief, it is only slightly corrected, achieving a better effect. In a similar way we process all surfaces, excluding "bricks". We wait until it dries.

Here is such a surface
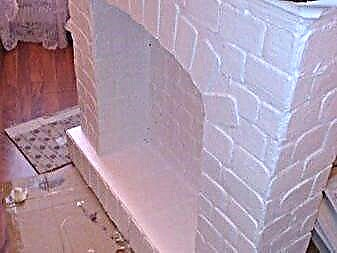
We take the paint of red-brown color and ivory (in this case). Brown paint the "bricks", light - the rest of the surface. A cardboard fireplace is almost ready. Remained finishing touches.

Here is a fireplace made of cardboard
After drying, we go through everything with a brush slightly dipped in gold paint. Dip the brush, wring it, once again remove the remaining paint on a sheet of paper. Using a semi-dry brush we pass the “seams” between the bricks, slightly touching the “bricks” themselves. Further in the same technique we emphasize the surface texture. It is important not to apply too much paint. That's it. A cardboard fireplace is ready.
How to make a wall?
This species is common among people living in apartments. It does not take up much space and fits well into any interior. To make a wall center out of cardboard boxes, you will need the following tools and materials:
- stationery knife,
- sponge, brush or other precision paint tool,
- reliable glue (“Moment” is recommended or glue for plastic products).
- construction tape
- putty or water-based white paint,
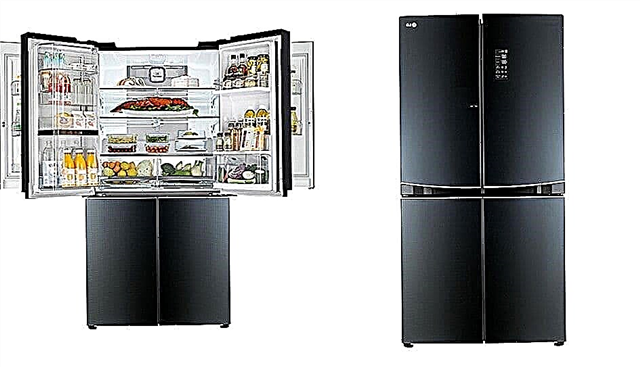
- cardboard boxes (if possible, large packages from under the refrigerator, widescreen TV or washing machine are more suitable for a fireplace).
- paper,
- pencil or thin marker for drawings,
- ruler
- polystyrene foam to create a stand and other decorative elements.
When creating a drawing on paper, it is desirable to designate not only the main building products, but also decorations.
Sometimes the owner does not have a pair of large boxes, but there are many medium ones. In this case, they can be carefully glued together and practically the same thing done.
When the sketch is ready and put on paper, you can begin to transfer it to cardboard boxes. For convenience, the main and auxiliary lines are applied in different colors of pens or markers.

Think through each step so you don’t miss a thing.
Next, make a furnace hole. To do this, take the knife and cut it in the center of the box. It is very important not to forget to leave part of the front wall on top and sides to stick it to the back and close the empty space.
back to menu ↑
Finishing work
After the work on creating the main frame is completed, you can begin to finish. Anything can be used here, depending on the idea. Usually it is pasted over with original wallpaper or tracing paper. If there are people in the family who draw well, you can apply beautiful patterns or draw thematic drawings in honor of a holiday.

Use your favorite fireplace material
If you want to make a standard fireplace, you can use foam bricks, as well as in the case of the Christmas hearth. Remember that artificial stones can be glued not only from the outside, but also inside, where the flame usually burns.
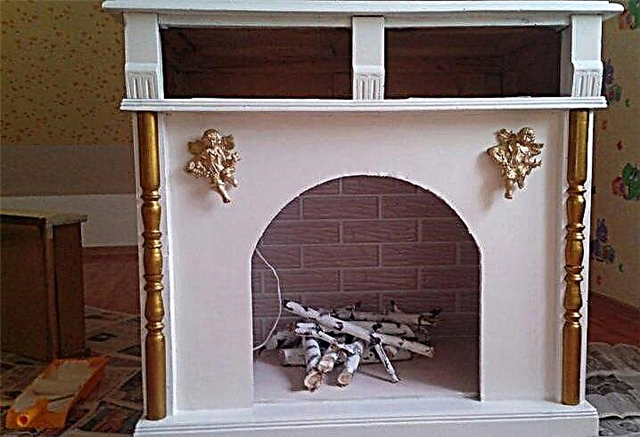
To decorate the front, in the store you can buy special figures in the form of flowers, angels and other things. They are made of lightweight material, so they never fall off, even when using conventional PVA glue.

Decorate the fireplace with various decor from the store
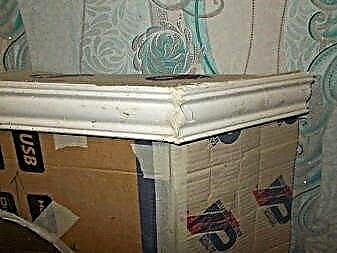
To install the shelf on top, you must first glue the baseboard along its edges. In this case, it is desirable to use as original products as possible. As a shelf, you can use a wooden sheet of plywood or other material, the main thing is that it is not too heavy. If the frame is not further strengthened, there is a risk of structural failure.
Measurements of the mantelpiece should be carried out only after the baseboard is installed; if it is cut to fit the dimensions of the fireplace itself, it may not be suitable.
back to menu ↑
Painting
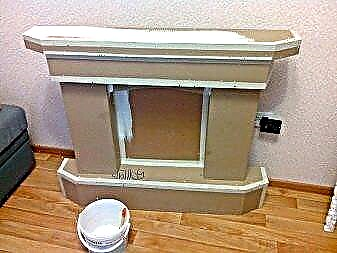
Almost 90% of people who make a fireplace for an apartment out of cardboard with their own hands paint it with white water-based paint. But if you approach the issue more creatively, you can betray the hearth of vintage and apply ordinary putty for drywall (after applying it, you need to dry the coating with a construction hairdryer).
If you still decide to just paint a homemade fireplace, you can use a simple brush, and a sponge is necessary to paint the most inaccessible places with paint.

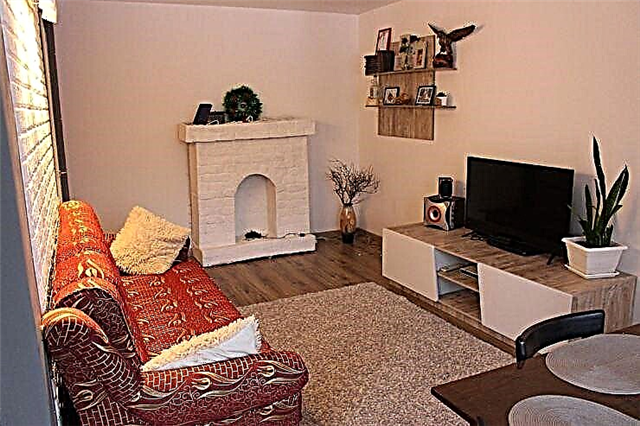
The easiest option is to simply paint white
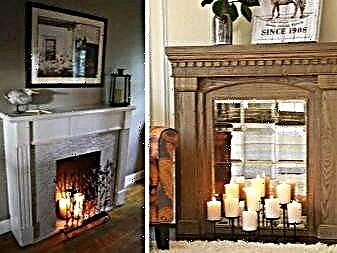
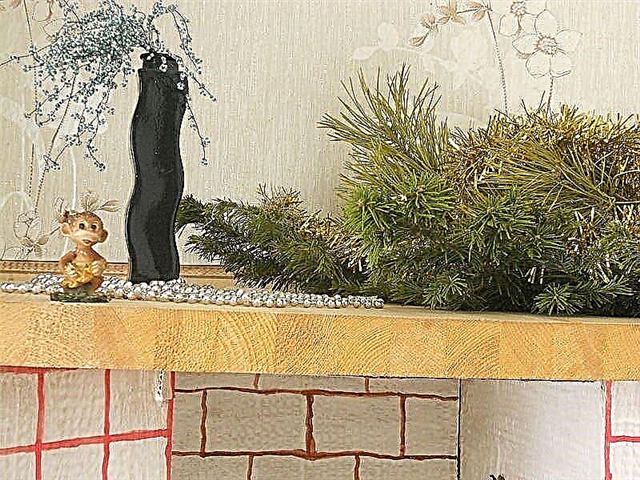
Wall-mounted is almost ready, it remains only to decorate it. Inside, you can set a photo of the real flame, and put real or home-made firewood into the firebox. Sometimes people put candle holders on a shelf, it looks very impressive and gives a sense of antiquity.
Decorate with all the festive attributes
back to menu ↑
Making the corner
The layout of some apartments involves the formation of a corner in a prominent place. As a result, the family thinks for a long time how to decorate or hide this flaw. One solution is to make a corner fireplace. The design is not overly complex, so all family members can take part in the work.

DIY corner fireplace
First you need to prepare the following materials:
- Transparent adhesive tape.
- LED strip, garland or candles on batteries for decoration.
- A construction knife and large scissors.
- Self-adhesive film or wallpaper with a brick pattern.
- Cardboard box, above average size.
The first step is to measure and determine the amount of cardboard that will be needed to completely close the corner. If the fireplace turns out to be smaller, the impression will be that it is pressed into a corner. If the problematic part is at the transition from one room to another, the design will not only create comfort, but also help to avoid blows against doorways.
Calculate the correct measurements for the future fireplace
back to menu ↑
How to decorate?
When the triangle is ready, it must be firmly glued with tape. If the design allows, the hearth is glued with self-adhesive film. To decorate a home-made fireplace, you can use wallpapers with various patterns.

Make a tough frame for sustainability
Now it's time to start making shelves. If there is no plywood or other suitable hard material at hand, the remaining cardboard will do. The only condition is to make it more durable, you need to use several layers. To finish the stand usually use self-adhesive wood.
Feel free to paste thematic wallpapers and decorate
Next, we are engaged in decorating the inside. To make a home-made fireplace glow from the inside, previously prepared electronic candles, garlands or LED strips are used. They can be folded inside and covered with artificial wood, which will create a burning effect. This center can also serve as a nightlight.
back to menu ↑
Making a solid base
The lower part of the home-made fireplace, which serves as a stand, must be strong and rigid, since in addition to the entire weight of the structure, it must withstand all objects installed on the hearth for a long period.
You can strengthen the lower border with the help of additional inserts, they will be fixed inside the cardboard frame. Such "ribs" can be placed along the entire length at certain intervals or simply stick randomly along the bottom.

Reinforce all parts for robust construction
The reinforcing inserts must have the same height, otherwise the weight will be distributed unevenly, which will affect their holding capacity.
The lower part in the form of a stand should always be longer and wider than the main structure of the focus, approximately 100-120 mm. To make a support, you can use 2 of the simplest and most effective methods:
- cut out two identical sheets of cardboard (bottom and top). On one of them "ribs" are glued to support the fireplace. Here you can use double-sided tape or glue,
- find a flat box with sides and install reinforcing inserts inside.

A simple way to do it yourself
back to menu ↑
How to decorate the stand?
Like any other element, the stand needs decoration. The simplest thing you can do is pick up the original side panels for it, glue the cardboard on with self-adhesive with a pattern, wrap it in wallpaper or paint it. But there are other, more original ideas.

Self-adhesive with a fireplace design
If the home-made fireplace was made in honor of the Christmas holidays, the base can be painted red or white and wrapped in rain with a garland.

Step by step creating an imitation
For standard, people often use wide skirting boards with beautiful patterns. They can be bought at any hardware store and installed in the lower and upper part of the hearth, it always looks very beautiful and holistic.

Elegant fireplace with a wide baseboard
Anyone who has no experience in construction can make a home-made fireplace of any kind. Also, such a hearth will make the apartment or house more comfortable, and on New Year's holidays will create the necessary magical atmosphere. It is worth noting that Christmas or other photos near the fireplace always turn out spectacular and memorable for life.
Material selection
Before you make a fireplace, we need to choose the right materials for the manufacture of such a decorative design. In order to assemble a false fireplace with our own hands, we need to acquire:
- Boxes. They can be either many different shapes and sizes, or just one or several large ones. Boxes can be not only different sizes, but also shapes,
- Wallpaper or plain paper. If you are going to use wallpaper to decorate the portal, one tube is enough for you,
- To glue boxes, wallpaper, paper together, you need to buy an adhesive base - it can be silicate or PVA glue,
- Scotch tape (regular, painting and double-sided),
- Paint brushes, sponges and rags,
- For basic work, we need a clerical knife and a simple pencil. Additionally, you can get a ruler and scissors, a tape measure and a building level,
- If you intend to equip a fireplace portal with a shelf or countertop, you will need a sheet of drywall or plywood.

It is also worthwhile to purchase the necessary materials for decorating the fireplace portal in advance. This can be a wallpaper that is imprinted, imitating the classic brick surface of the fireplace. A cardboard fireplace can be decorated with a self-adhesive film, the surface of which imitates natural minerals such as marble, sandstone or granite. Classic volumetric patterns represented by various columns, gypsum elements, plinths, and foam decor look beautiful and stylish. Also, the surface can be painted with simple paint from a spray can or bucket.

If you want a coarser and more heterogeneous surface at the exit, it is recommended to use liquid wallpaper that has a corrugated structure and a rather heterogeneous surface. All kinds of acrylic compositions are very popular. Such paint is practically odorless, dries quickly and has interesting shades and tones (gold, silver, bronze, sparkles, mother of pearl).
Introducing Varieties
A fireplace, the portal of which has an exclusively decorative function, may have more advanced functionality and a number of additional features. Such a false fireplace will be a great addition and decoration of the electric fireplace insert. Electric fireplace It will be a great alternative to a wood stove and can be installed even in an apartment.

Since cardboard and boxes belong to the class of flammable, it is not safe to install a biofireplace or gas center in it. For the same reasons, it is strictly forbidden to install a fireplace with a water circuit.

The installation of such foci is impossible not only because of the strong heating of the case, but also because of the sufficiently large mass. It is also not recommended to install open fire chambers and an electric fireplace with a heating function.
The best option is a modern electric fireplace with 3D the effect of a burning flame and high-quality sound visualization, backlight.
You can make a false fireplace with your own hands in one of the following styles:
- Fireplaces in the Art Nouveau style belong to the category of modern fireplaces. The direction is original in its shapes and sizes. The presence and use of contrasting shades, bright, catchy and cold tones is possible,
- A hi-tech false fireplace will look stylish and original. To create the necessary image, you can design the portal in one fairly calm and muted shade (black, gray, white, silver, metallic). Complete the image with a mirror or glass decor,
- Classic style is always appropriate and will be relevant even after ten years. A classic fireplace is a wealth of patterns, ornament, voluminous decor, expensive decoration. It is fashionable to supplement the framing with columns, candlesticks, shelves,
- Rustic style or country motives will make the fireplace and the atmosphere in the room as cozy and homely as possible. For finishing in this direction, natural and environmentally friendly materials are always used. However, for a fake fireplace, you can use photo wallpaper with a pattern and stone texture. You can decorate the combustion chamber with firewood.

DIY assembly
It turned out that it is possible to make a fireplace with your own hands quickly and on a budget. To do this, you will need to use the following walkthrough:
- First of all, decide on the room and the specific place in which the structures will be installed. A false fireplace can be island, corner or wall. The smallest are the corner portals. Also, with the help of the fireplace you can hide some wall defects,
- Using the building level, pre-apply all the necessary scaffolds to the floor and walls and make a verification check,
- An important role is played by the quality of the pre-compiled drawing and sketch of the fireplace. Make it as detailed as possible, indicate the dimensions and features of the furnace, portal and each decorative element,
- As the basis can serve as several separate boxes glued together, and one large box from under the LCD TV. For gluing together several boxes, double-sided tape is used,
- We remove excess decor and things that interfere with the work from the room. We draw on the box with a pencil the marks indicated in the drawing,
- The basis of any false fireplace is the podium, which is responsible for the stability of the structure. The podium must first be strengthened. For this, its sidewalls are supplemented with special cardboard inserts. The ribs must be installed in a perpendicular position to the podium and fixed with tape. Each rib has a height equal to the side edge of the pedestal. Also, the sides of the pedestal can be strengthened with several layers of cardboard, which are attached to the tape. In order for the design to be as stable as possible. The podium is made wider and larger than the portal by 80-100 millimeters.


Next, we proceed to the formation of the fireplace portal.
Do-it-yourself portal for a false fireplace
The fireplace in the apartment consisting of cardboard or boxes can be made of either frame type or have a back wall. Fireplace instructions or step-by-step assembly instructions:
- If you want to assemble a frame frame, you need to prepare cardboard, which will become the front part of your fireplace. We draw marks in the area where the focus will be located, and make an incision in the upper part. For this we need a clerical knife. It is also necessary to incise the central part of the portal. We make a bend of the cut sections, they will become the sides of the furnace compartment. A rectangular strip is cut, the width of which will be equal to the sides of the frame, and the length - the width of the furnace compartment. After that, we fix the ceiling part to the adhesive tape and strengthen the inside with frame panels consisting of 2-3 layers of glued cardboard. The frame is installed and fixed on the podium with glue,
- A portal with a back wall is easier to implement. It can be formed from just one big box. Incisions are made in it, the upper and furnace parts are formed and bent. Next, the portal is installed and secured to the pedestal.

You can supplement the false fireplace and make it more functional with the help of the mantelpiece. You can collect it from one sheet of drywall or plywood. Also, a fairly high-quality shelf is obtained by gluing together 2-3 layers of cardboard. To fix the shelf to the frame, use double-sided tape.

Before proceeding to facing the portal, it is necessary to prepare the surface. To do this, the cardboard is pre-painted with water-based paint, acrylic from a spray can or putty. This is necessary to obtain a uniform shade and get rid of contrasting spots. As an alternative, you can glue the surface of the portal with several layers of white paper, the so-called paper mache.

For surface cladding, you can use murals with imitation of brickwork, marble, granite. The rough surface formed by applying liquid wallpaper looks advantageous. You can simply paint the frame or apply a self-adhesive film.

The firebox is also made out at your discretion: firewood, garlands. Above the fireplace you can place a mirror, clock, picture. On the shelf are various candlesticks, candles, figurines, photo frames.
Cardboard fireplace design ideas in photo format
You can make an imitation of a fireplace from cardboard of any shape. Several ideas are collected in this section. You already know the principles of assembly, you can come up with a decor yourself or use ideas from a photo.
If you use good wallpaper “brick-like” it will turn out very naturally

If you use good wallpaper “brick-like” it will turn out very naturally
One large box will make a medium-sized fireplace

The more complex shape and the used polyurethane moldings work wonders
Types of Fireplaces
Three types of fireplace are most popular:
- Christmas,
- Angular,
- Standard wall.
The number and type of boxes required for the manufacture of the fireplace are selected in accordance with the specific design and its design.
To give the structure the greatest rigidity, a wooden frame is constructed and placed inside it.
Christmas fireplace
How to make a Christmas fireplace out of the boxes with your own hands. To make such a fireplace, two identical and one large box are required.
Two identical boxes are glued or attached with tape on the sides of a large one. Then a part of the front wall of the large box for the fireplace insert is cut out.
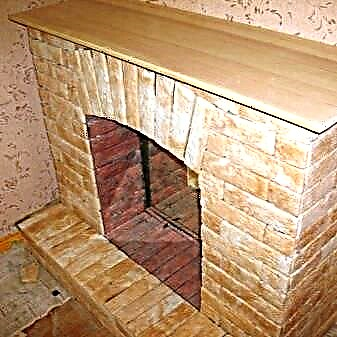
The fireplace will look much more thorough if it is placed on a base made of foam "bricks".
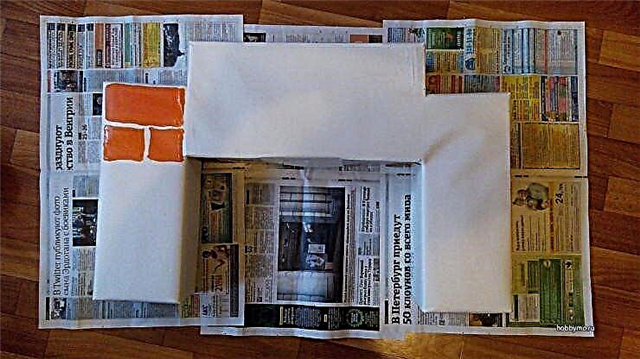
Foam bricks
Rectangular plates are cut from thin foam and then glued to cardboard in order to resemble brickwork.

After the glue dries, the foam is primed in several layers, and then painted in brown or golden color. The base is painted mainly in yellow.
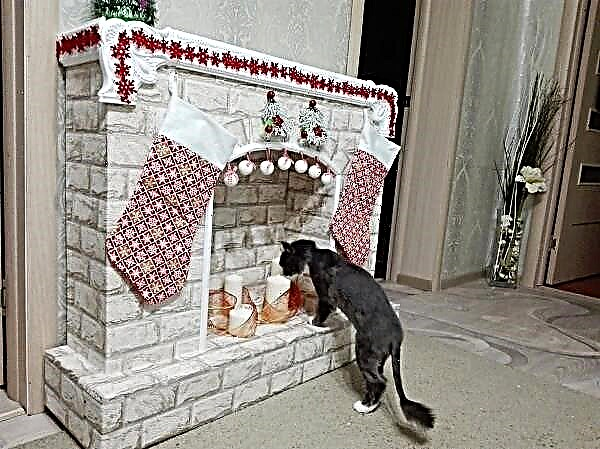
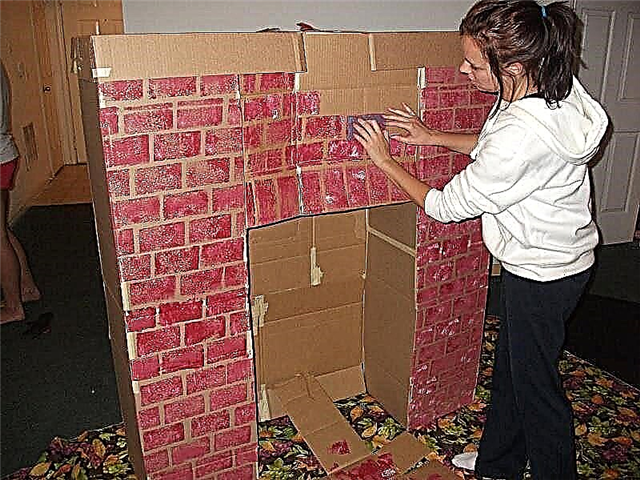
Fireplace "Wall"
Such a fireplace is small and creates a unique cosiness in the house. How to make a “Wall” fireplace from cardboard boxes.

To do this, you need: cardboard boxes (it is recommended to pack large household appliances, such as a refrigerator), a brush, knife, sponge, high-quality glue, adhesive tape, polystyrene foam for the stand, white water-based paint (or putty).

In the absence of large boxes, they can be replaced by several smaller ones glued together.

The completed drawing is transferred to the boxes. The furnace hole is cut with a knife in the center, leaving part of the wall on the sides and top untouched.
Finish
Tastes and preferences of the owners should suggest the basic design tasks of finishing work.

The frame of the fireplace is glued, including inside, with tracing paper or exclusive wallpaper, patterns or drawings are applied, and original figures of flowers, plants and angels purchased at the store are glued. Sometimes foam bricks are used, as in the previous case.

When installing the shelf to mask the gap between the shelf and the box, the baseboard is glued.
The shelf should not be too heavy, otherwise, in the absence of a strong frame, the structure may collapse. The dimensions of the shelf should take into account the installed baseboard.

Dyeing
Most people, after they have made a decorative fireplace out of the boxes, paint it with light water-based paint.

But there are other solutions. For example, covering the structure with a conventional plasterboard putty, which is then dried with a building hairdryer.
When painting the fireplace, a brush is used and, if necessary, a sponge. Inside the finished fireplace, photos of burning firewood and logs (or their models) are placed. Candlesticks and antiques on the fireplace shelf will give it an intriguing and mysterious look.
Corner fireplace
Instructions for the manufacture of corner fireplace from the boxes. If there is an unoccupied corner in the apartment that makes it difficult to perceive your home as an integral functional space for life, the “Corner” fireplace will help to fix the situation.

A simple design allows you to attract the whole family to the manufacture of the fireplace. The skills acquired by children in such work will help children understand how to make a fake fireplace out of the boxes with their own hands.

For work you will need: a garland or an electric candle, an LED strip, scotch tape, scissors, a knife, a self-adhesive film or wallpaper "under a brick", a large box made of cardboard.

Having made the necessary measurements, it is necessary to calculate the amount of cardboard needed to make a fireplace. When the triangular base structure is ready, it should be fastened with tape.

To decorate the fireplace, it is glued with wallpaper. To impart rigidity to the structure, a frame is built in.

Fireplace base
The base must exceed the size of the fireplace by 10-20 cm. It must support the weight of the entire structure with decorations placed on it, and therefore it is necessary to ensure its strength. This is achieved by inserting stiffeners in the base frame.

Such ribs should have the same height for uniform load distribution and stick to the entire area of the bottom of the base in any order.
Corner raised fireplace
A corner raised fireplace can also be made with your own hands. To do this, you will need the following walkthrough:
- We find the most advantageous angle for the location of the fireplace in the room with good visibility,
- From one big box we make a podium. We cut the sidewalls and form them so that they perfectly repeat the shape of the selected angle in the room. For fastening we use masking tape,
- To strengthen the structure, we equip the sidewalls with stiffening ribs. To do this, we make small sizes on the sides with the help of an office knife. The optimal distance between the incisions is 10-15 centimeters. The tags will connect on the inside and bend the cardboard. Next, all excess and remaining cardboard is removed, glued,
- In the center of the portal is the size of the furnace. Recommended shape: square or rectangle. The top may have a slight pore rounding to the arch principle. The lower part is not cut, but bent inward to form a firebox. We fix it on masking tape, cut off all the excess,
- At the next stage, it is necessary to form the side walls of the portal. For this, two cardboard sheets are taken, the height and length of which is equal to the dimensions of the furnace compartment. We cut them in shape and fix them on masking tape. The upper part of the fireplace is also formed from one cardboard sheet,
- We equip the portal of the mantelpiece from two sheets of cardboard interconnected with PVA glue,
- After the glue has dried well, we carry out the facing of the frame with the selected materials.


As an addition, you will burn do-it-yourself decorative firewood for the fireplace. To do this, take cardboard and remove the first smooth layer into it. We determine the length and thickness of the logs, so that they look harmoniously with the fireplace insert. To form firewood, it is necessary to cut off a strip that rolls up and can be supplemented with small knots. To form logs, after rolling, it is necessary to glue the edges of the workpiece well with PVA glue and fix it with a thread. For small branches, it is enough to cut a small and very thin strip of cardboard, glue it, dry it and stick it to the main log. Then the surface is painted with white paint and after drying it is repainted with a suitable color. For the manufacture of birch logs, the original color can be left white and after drying the paint, apply a few strokes, strips of black paint.


For coloring, you can use acrylic, oil or gouache.
Everyone can make such a decorative fireplace from cardboard boxes. At the same time, the design and decoration of the false portal can be the most diverse. The advantages of a raised fireplace from the boxes include mobility, light weight and environmental friendliness.


In this video, you will learn more about how to assemble a fireplace from boxes or cardboard with your own hands for an apartment, a house. The video presents the Christmas fireplace for the new year:
You may also be interested in:
February 26, 2019 5871 0

February 22, 2019 1400 0

February 20, 2019 7856 0

February 17, 2019 2694 0

February 16, 2019 1752 0

February 15, 2019 2780 0
February 14, 2019 1447 0