This article discusses everything about additional door elements: their types and sizes, the materials from which they are made and how to properly mount different types of this attribute.


What it is?
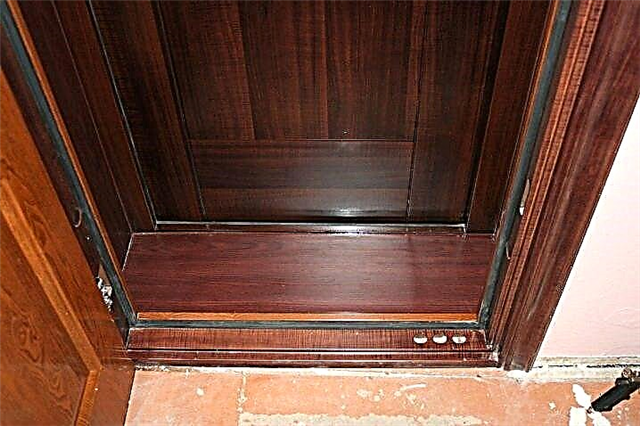
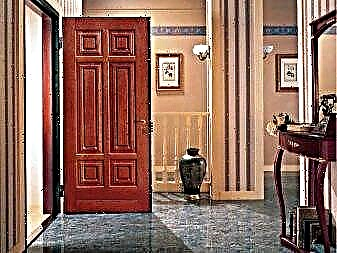
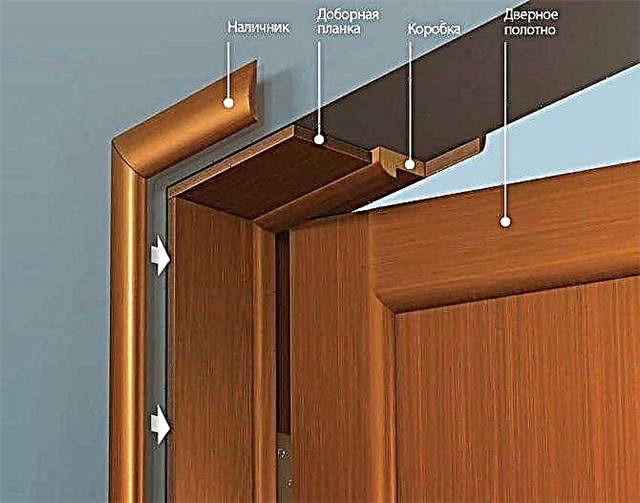
Often when installing doors, it is clear that to complete the picture, only the canvas is not enough. It is necessary to finish the work so that the opening is brought to mind and looks the most aesthetically pleasing. To achieve this, dobras on the front doors are used. Additional elements - a construction in the form of the letter "P", consisting of three overlays - two vertical and horizontal. They are necessary to complete the installation of the door frame.

When choosing add-ons for the entrance group, you need to know that they are divided into three types:
- Simple without edge. This is the easiest option. It looks like a raw straight bar. The slices are hidden, but with differences in humidity, such a design will not serve you for long.
- Simple with hem. When choosing such add-ons, all edges will be covered with an edge that will protect the material from moisture. When using these two types of extensions, structural elements must be perfectly fitted, otherwise part of the coating will have to be cut off.
- Telescopic. They are the most convenient and most versatile among all presented. The reason for this is that in the manufacture of the system is used "groove + comb", which allows the use of shields of absolutely any size.
Materials
These appliances are made from materials such as fiberboard or laminated board, metal and wood. If you choose an item to a metal door, you should give preference to wooden add-ons. In combination, this will create a robust and beautiful design. PVC platbands are used only with doors of the same material, otherwise the combination of materials will be noticeable in the interior.
Benefits
Extras give the following advantages for the door leaf:
- Moisture resistance
- Resistance to physical influences,
- Soundproofing,
- Thermal insulation
- Possibility of self-assembly
- Fast installation speed,
- There is no need for putty to fix visible errors,
- Large selection of colors,
- Attractiveness
- Resistance to subsidence of the door frame during operation,
- Long operation.

Dimensions
Dimensions of additional elements depend on the size of the doorway. The width of simple additional elements can vary from 10 to 20 centimeters. Most often, platbands are presented in widths of 10, 12.15 and 20 cm. But options with an arbitrary, predefined and necessary width for a certain opening are possible.
The use of telescopic extensions allows revetting an opening in a wall of any width. Although there are standards in the size of such extensions (90.120 and 150 millimeters), but thanks to its features, even the largest aperture can be ennobled with such elements.
It is necessary to select the sizes of elements with special accuracy. Even a centimeter error can ruin all the work you have done. It is better to take elements with a margin, because in the process it is easier to remove the "extra" size than to build up the missing millimeters.


Calculation of the number of elements
There are standards by which door manufacturers make doors. In Europe, the standard door height is 210 centimeters, in Russia, two meters. Extensions, respectively, should have the same length. And they can have a different width: from 5 to 55 centimeters. High-quality wooden elements or MDF elements have a width of 10 millimeters.
It is difficult to select parts for private homes. They were built without taking into account modern standards. Often this makes it difficult to choose the desired length and width.


The question then arises, but how to calculate the number of elements. When calculating, it is necessary to take into account and know that:
- During installation, the extension will go a little deeper, respectively, its size will decrease,
- Measured by the tape measure between the edges of the door frame,
- All measurements are checked in three places: left, top and right of the opening,
- The working quantity will be the largest.
Here is an example of calculation. The wall has a width of 240 millimeters, the door frame is 80 millimeters. So, the extension is needed in 160 millimeters. A width of 200 millimeters is suitable for you, excess is removed with a saw or a jigsaw.
Installing custom extensions
You can immediately notice that the cladding begins only after the foam has dried and the door leaf is fully assembled. It is necessary to prepare the surface for facing. To do this, you need to clear the foam of a place with a depth of about 1-2 centimeters behind the door frame.

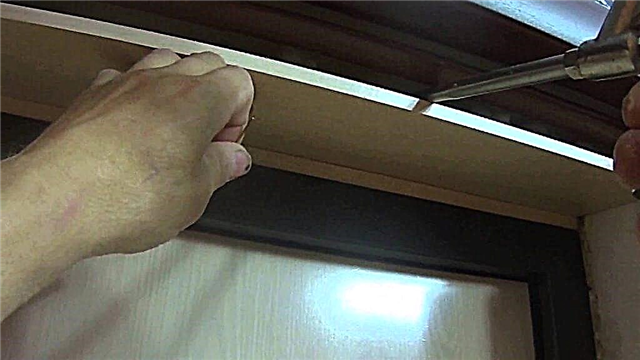
The installation process itself follows. The first additional plank is prepared first. First, it is sawed along the length (if possible, it is necessary to make the product slightly larger than the opening), then the width. To choose the width of the workpiece correctly, it is necessary to draw two marks on the inside with a pencil, using the wall as a guide. For quality work on cutting parts, you need a jigsaw with a wood file mounted on it. After that, the upper element is ready for installation in place. But for the final installation, you need to make both side parts. They are adjusted in the same way as the upper element.
You should also pay attention to the length of all elements.
There should be no gaps between all three extensions, while the upper part should be placed in a horizontal groove.


When all of the above has been done, you begin fastening this design. To begin with, wooden wedges or thick cardboard are taken and wedged into the box and the opening. This is done in order to get rid of the gap between them.
Next, the evenness of the installation installation is checked. In this case, it is necessary to check all the gaps: at the joints of the elements, do not forget to check the bottom of the side parts. If there is a need - we correct or wedge with various inserts.
After this, a foam bottle with low pressure is needed, when solidifying, we fill it with all visible voids. First, with foam, we fix the entire structure, then fill all the voids. If necessary, the installation of platbands will have to wait until the foam has completely dried.


Installation of telescopic extensions
This type of finish elements must be installed in the presence of cracks and chips on the walls, also sticking wires can serve as a reason. Thanks to them, aesthetics and tightness are achieved. Another factor may be the size - when the thickness of the wall is more than 140 millimeters, there is a need for such special panels with which you close this gap.
When installing telescopic extensions you need: an accurate eye, accuracy, attention to detail and leisurely. There are three ways to install them:
- with the location of the upper bar between the side,
- with the location of the upper bar above the side, the upper part "lies" on the sidewalls,
- with washed down joints of parts at an angle equal to 45 degrees.
The latter method is the most difficult to implement, therefore, with the slightest uncertainty, you must either choose another option or consult a specialist.

The installation process for such add-ons is similar to the installation of ordinary add-ons. The manufacture of parts begins only after the box is ready with already mounted door leaf. It is necessary to wait for the foam to completely dry, remove the excess pieces of foam that stick out to the outside and then proceed to install the add-ons. Their peculiarity lies in the fact that the width is not regulated by trimming the part, but with the help of rails. The width of the additional shield directly depends on the number of rails.
First of all, rails are installed around the entire perimeter of the door jamb. Only after checking the accuracy of the work performed can you install the second row, if necessary, the third and fourth. Experienced craftsmen can assemble the finished structure immediately as a whole, but it is not worth the risk during installation. It is much better to do this work slowly and accurately.


It is necessary to carefully adjust the horizontal and vertical elements in order to get rid of possible gaps. When installing, you also need to pay attention to how tight the ridges fit into the grooves. In the absence of density, additional cracks may appear around parts. Since this design is not heavy in weight and it will not experience frequent mechanical stresses, there are two options for fastening structures: finish nails or liquid nails.
Often you can face a situation that the door jamb is far from perfect and there is a skew. But even in this case, you can correctly and beautifully mount the extensions. If there is skew, then during installation, the upper part will deviate from the side. If the deviation is 5 degrees or more, it is recommended to straighten the skew and only after that start mounting the elements. When you start work with a skewed jamb over time, you can get additional slots that will ruin the entire interior.


If the skew is less than 5 degrees, then you can install extensions with the subsequent filling of the walls. But in both cases it is necessary to observe the evenness and align everything with wedges. After installation, you need to provide the elements with immobility for a while. Fixation is carried out with construction tape. Also, spacers are placed between the side rails, so that the structure does not move. The gaps are sure to foam. To do this, you need a foam bottle and a knife. We introduce the foam. Then we wait when it hardens, after the excess is cut with a knife. It must be removed carefully, in a level with a wall.


Beautiful examples in the interior
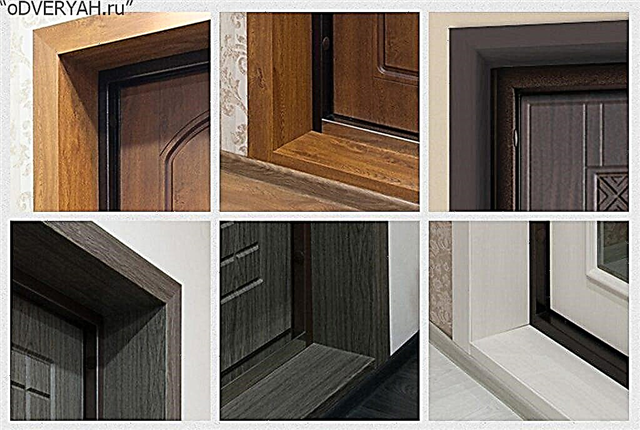
For some points you need to pay attention to when choosing such elements. Firstly, the finishing blocks must match the color, pattern and texture of the door and the doorway. Otherwise, an attempt will be made to combine the incongruous. It will also ruin your impression of a brand new door.
The color of the parts is selected:
- the color of the wings
- to match the skirting boards
- in the color of the walls
- or to highlight the door use dobras of contrasting color.
When choosing finishing elements, you should rely only on your stylistic preferences. After all, combining high-tech and elements of ancient Russian architecture is at least illogical and unaesthetic.

You will learn more about how to install extras on the front doors from the next video.
What dobors provide
- Interesting, original design of the opening. The range of boards is significant both in color (texture) and size. They vary within (mm): width - from 50 to 250, thickness - from 5 to 30.
- High speed of work. Installation of add-ons is quick, and even a beginner in this field can do it.
- Partially increase the sound and heat insulation characteristics of the opening.
- Mask his fatal defects.
- Protect slopes from damage, wet.
- With proper installation, they prevent distortion of the box due to temperature deformation, natural wear of the material.
Prices for the installation of platbands and extras on the door
| Description | Prices |
| Departure to home, office | |
| In case of service provision | is free |
| In case of failure / transfer | 485 RUB |
| Installation of add-ons | from 485 rub. |
| Installation of platbands | from 291 rubles / side |
| Installing a door stop | from 97 rub. |
| Door Closer Installation | from 582 rub. |
| Other door installation services | |
All masters work under a contract, therefore they are financially responsible for the services provided.
Balashikha professional masters work at the prices of our service, and not at their overpriced
The cost of work is agreed upon at the stage of diagnosis, without coordination work will not begin
We have many masters, so we can solve the problem of the client within 2-3 hours or when it is convenient for him
Customer reviews

According to the specifics of installation
- Without protective edge. Such doorbell extensions are the cheapest. But they are recommended to be installed after additional processing of the edges. Otherwise, the gradual absorption of moisture initiates the deformation and destruction of the material, when it comes to wood-based products.
- With protective edge. More reliable panel modification. Difficulty - in choosing the size. Accepted inaccuracy will lead to the need to fit the extension in place. And this means that it will have to be cut.

- Telescopic panels. They have docking spikes, grooves and are adjustable in width, the quality of the lining, its durability are ensured.

Installation of platbands and extensions in Balashikha
Installation of any kind of doors in the house is painstaking work. It requires a lot of time and effort. Usually, the installation of doors includes the installation of platbands and extras on the door. What to do if you are faced with this need and do not know how to do it?
GorMaster service in Balashikha will help you! We offer you the service of installing extensions and platbands on the door.
- It is possible to provide services on the day of application for work!
- The experience of the masters is from 2 years.
- The work is carried out promptly and dynamically.
- Wizards begin to work only after negotiating with you the final price.
A specialist will come to you, evaluate the amount of work and agree on a price.
The process of mounting platbands and extras
1. Depending on the design of your designer, metal, wood, MDF or PVC products are selected.
Most often, wooden or MDF models are used due to their attractive appearance, a variety of colors and textures. However, metal samples are also widely used.
Finishing the front door can be in several ways:
- due to the door frame
- on the wall,
- on a specially purchased frame.
2. The master cuts two side blanks of the same size. They are attached to them on the side of the doorway.
At this time, the master cuts the top of the harvested material. And it is also installed from the sides of the opening.
3. This algorithm is performed and vice versa in the case when the door paneling starts, on the contrary, from the top piece. Then the side extensions occupy a position above the floor and below the bar. However, installation is always done only from the side elements. This is the only true and appropriate option in our case.
4. There is a second option for installing add-ons. To carry out this work, the master measures the depth of the doorway from its edge to the door frame. Next, wooden blanks for the frame are made. It is required to install this element using installation tools. After that, the master fixes the extensions on the door, using glue for installation.
5. Platband escapes the doorway. In the form of platbands are flat, rounded or curly. Can be mounted on top or telescopic. The first method involves the installation of elements using nails driven through the platband into the wall surface. In addition, other types of fastening structures are sometimes used, which subsequently hide under the door element used for decoration. Telescopic platbands are installed using a special scallop, which is inserted into the groove on the extension or its level. In this case, glue is used to achieve the strongest fixation of the part in the right place.
To order a service, go to the site of the GorMaster service service and leave a request for this service! Our manager will contact you and assign a specialist to you!
- The provision of services only after negotiating the price.
- Warranty for all types of work up to 1 year.
Now you do not need to worry about the correctness of self-installation of platbands and requisitions! Masters of GorMaster in Balashikha will do the job for you!
Bonding
The simplest technology, for the implementation of which a lot of time is not needed. But she has significant disadvantages.
- Extras have the correct geometry. Consequently, the surface on which they are mounted must be as flat as possible, not have differences in the height of individual sections, and this is not always possible or extremely difficult to achieve. To eliminate small distortions of the panels, different methods are used. But in this case, the own-hand lining of the entrance opening is greatly complicated, and its strength is reduced.
- Adhesive bonding eliminates the possibility of insulation and sound insulation. How important this is, you have to determine for yourself.

Tip. For minor wall defects, it is advisable to use a mounting foam as an adhesive. It will fill all the recesses, and after installing the extras, it will ensure the evenness of the lining and the reliability of its fixation. A large consumption of funds pays off by the fact that the finish of the entrance opening will not take much time, and the hallway will be spared from dust and dirt.
Fixing the extensions to the crate
The technology is familiar to everyone who was engaged in self-designing the facade of the building, rooms with clapboard and other finishing panels and plates. The nuance is that you need to select the material of the racks in relation to the extras. If they are metal, then the corresponding profile for wood products is wooden bars. The reason is the identity of the expansion coefficients, with their difference in the warpage of the cladding in the future can not be avoided.

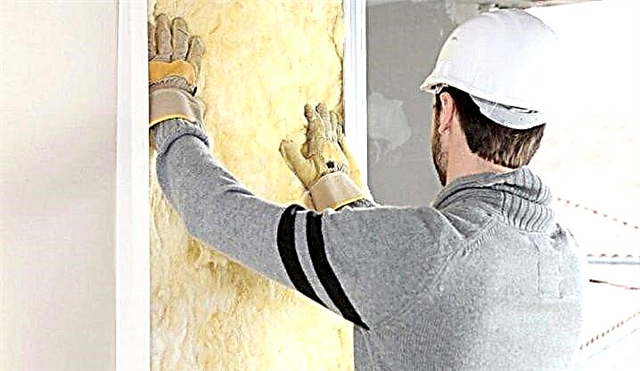
This technique allows you to put insulation into the cells of the supporting frame, and before installing its rails, you can finish the wall with hydro- and soundproofing material. Many owners use foil-rolled products (for example, penofol) for these purposes. For old buildings, houses from reinforced concrete products - a good solution that allows you to additionally insulate the opening in the area of the front door.
Features of installation of add-ons
- It is advisable to use self-tapping screws to fix the panels. Nails are not recommended for several reasons.
- They easily split dry wood.
- Maintainability is poor. If replacement is necessary, there is a risk of damage to adjacent elements.

- When using mounting foam, the extensions must be fixed with spacers. The composition has the property of increasing in volume, and this initiates the curvature of the lining. Gaps are formed between the panels, differences in height, and this cannot be eliminated, only the dismantling of the samples and everything from the very beginning (cleaning the base and then point by point).
- In the process of registration of the entrance, designers recommend decorating the panels in a color different from the door, that is, making them somewhat lighter or darker. This solution diversifies the interior of the hallway and effectively highlights the contour of the opening.
- Metal extensions to steel doors have no grooves. The installation procedure is indicated in the manufacturer's instructions.

It’s easy to do it yourself. Manufacturing recommendations are quite simple.
- Material. The best option is a tree. It is easy to work with the board (you only need a household tool), in addition, it is inert to temperature extremes. It is more difficult with metal - it will have to be additionally decorated with a special film, it is easier to purchase additional pieces of the appropriate size. Variants of MDF or other boards do not involve spike / groove joints (the strength is extremely low), and therefore it is better to abandon them.
- Sizes. They are determined from the cut of the wall (plus the thickness of the lining of the adjacent surface) to the duct of the front door, the platbands are not taken into account.
- Type of product. Planks with prepared grooves / spikes are more expensive, but it is easier to install such finishes, and the lining of the opening will turn out to be of the highest quality.
Further processing of the panels is at your own discretion: impregnation, the use of aging wood technology, tinting with wood stain, applying a layer of varnish - there are enough options.
Extras for entrance doors - an excellent solution for the design of the opening. It is only necessary to take into account that these decorative boards should be installed before the installation of platbands. To give stability to the cladding, to increase the degree of sound and thermal insulation, it is advisable to firmly fasten the panels with the box. This solution eliminates drafts through the cracks, and they will eventually appear due to deformation (shrinkage). Plus, the same foam gradually loses its properties (shrinks), and soft insulation materials, although with different intensities, absorb moisture.
Types of optional trims
The owners will have to get acquainted with the extras if at least one of the doorways is deeper than 8 cm in depth. In this case, a gap remains between the platband and the loot. And the thicker the wall, the more likely it is that a narrow strip of emptiness will turn into a small failure. It is most advisable to close this space with a bar in the color of the box.

The add-on consists of three parts. Two of them are on the sides, and the third should cover the upper gap. These elements are not included in the door kit, but if it is known in advance that they will be needed, it is better to purchase them immediately so that the texture and shade match the entire door kit.
There are two types of add-ons:
- A standard plank with or without trim, with standard widths of 10, 12, 15 and 20 cm,
- Telescopic, in which installation occurs without fasteners due to the existing groove at the ends. The width of such an element is 9, 15 and 20 cm.
The length of the side planks is the same for any species: from 210 to 220 cm.
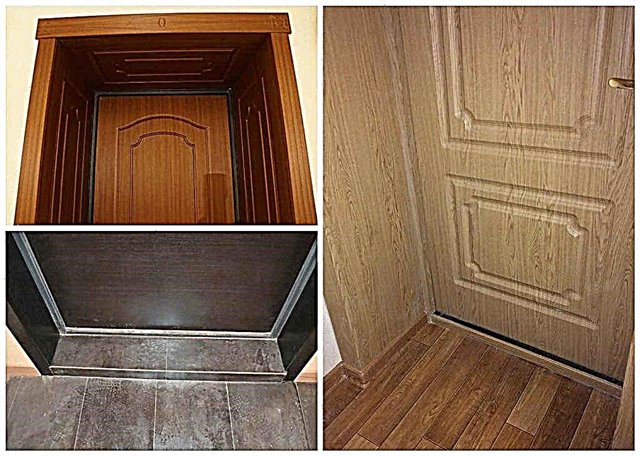
In order to understand in more detail what the door extensions are, it is recommended to study the photos presented.
A reasonable question arises: are they needed at all? After all, you can plaster a part of the opening, and then paint the surface or glue it with wallpaper. There are many people who do this. But in favor of the add-ons, 3 reasons speak for themselves:
Installation of strips, in contrast to plastering, takes very little time. Finishing is carried out immediately when installing the door frame, it takes just a few minutes and completes all the work. After that, nothing needs to be done with the loot.
It is known that wood or MDF is better not to check for strength once again. A crude solution, before completely drying out, may have time to deform the surface of the stock or clypeus. Due to the prolonged exposure to moisture, the outer finish coating will peel off.

But the most important thing is that even with the most durable installation, the movement of the door leaf is accompanied by vibration. It is transmitted to the box and causes cracks in the plaster. In this case, regular repairs will be required. It is small, but unpleasant. And when using add-ons on the front door this will not happen.
Installation of add-ons
Additional elements, performing a decorative role, are also needed as the basis for the installation of platbands. Therefore, it is necessary to ensure that the end of the additional plank is flush with the wall. This requires accurate calculation, and it can be performed only after installing the loot in its place.

After all measurements, the trims are sized. For telescopic elements, it is necessary to take into account the depth of the groove. Then do not forget to add these numbers to the measured width of the opening from the groove to the corner of the wall.
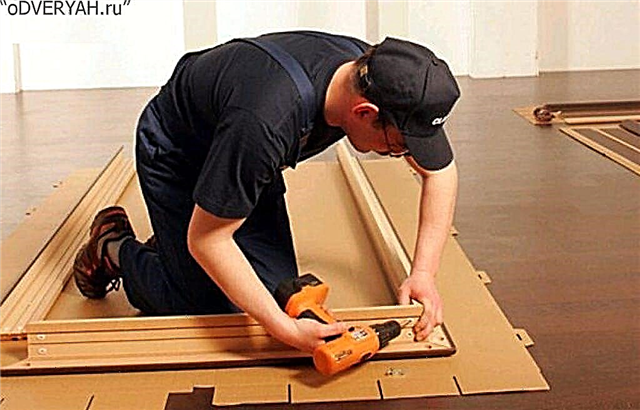
In order to mount the extensions on the front doors, there is no need to call the master. Do-it-yourself installation does not require specialized knowledge. Enough skills with tools like an electric drill, screwdriver and hammer. Still need experience in applying foam.
Installation on self-tapping screws
The method is quite complicated, but suitable for those who value reliability and durability. It will require masterly mastery of the drill. The result is justified by the fact that the service life of the structure will increase and it will not be afraid of any vibration.
It is necessary to make 4 through holes at equal intervals in each vertical element, and then 3 in horizontal. You need to drill from the end of the extension, and for this you need a drill that will be slightly longer than the width of the bar. Well, if there is an opportunity to do this operation on the machine. Then the holes will be perfect, without bias.

To achieve accuracy with manual drilling, it is recommended to duplicate the operation on the other side of the bar. The diameter of the drill is selected according to the size of the screws. Then, on that end, which will be located on the outside, on the drilled holes, you need to make a blind for the screw head. It is made with a drill of a larger diameter.
Self-tapping screws are screwed into the extension until a sharp edge appears on the other side. Then the bar is installed to the box and all the screws are screwed to the end. The fastening length is selected so that at least 2 cm of the self-tapping screw enters the loot.
To preserve the geometry of the structure, if necessary, spacers are installed between the wall and the extension. Before blowing the cracks with mounting foam, the wall and the inside of the strip are moistened.
Installation on nails
Finishing nails are needed. On that part of the butt end that will be in contact with the box, holes are drilled in increments of 20-30 cm. The holes are made to a depth of no more than half the length of the nail. At the last, a hat is removed with pliers. Then the nail is placed in the hole so that its sharp side looks out.

Using a carpentry hammer or a regular and wooden gasket, the dobro is nailed to the bottom. If necessary, the structure is wedged, and then blown with foam. The bad side of the method is that nails can chop a wooden piece.
Foam installation
This method will help those who rack their brains how to install extras on the front metal door. Elements are set in place. To maintain the geometry, they wedge inside and burst outside. The gap is abundantly wetted with water and the voids are filled with sealant. There is no need to fix the extensions. After the foam hardens, a solid monolithic structure is formed.
Crate mount
The technique is suitable for those who are already familiar with wall cladding with lining or decorative panels. The only thing to consider is that the crate material should be identical to the selection. If the panel is metal, then an aluminum profile is required. When the element is wooden, then the same bars are used. This is necessary to avoid warping of the cladding.
The method is good in that it allows you to pre-fill the voids with any insulator. This enhances the heat saving of the input opening, and also increases the noise reduction.
Mounting telescopic slats
To use such elements, the box and platbands must have special grooves. You can purchase a finished piece with the possibility of mounting in a spike. But in the presence of a circular saw, such a groove is chosen independently. Naturally, its manufacture can be ordered.

In this case, the installation is simplified as much as possible. It is enough to get spikes into the grooves and align the elements according to the geometry of the structure. After installing the spacers or fixing everything with construction tape, after wetting, blow out the voids with foam.
Useful Tips
Installing add-ons on the front doors with one mounting foam is the easiest way. It will cost less than using fixtures. In addition, the final structural strength will be no worse than that assembled for self-tapping screws. After all, such complex methods were used until the construction sealant appeared.
When the junction of the vertical and horizontal strips has a gap, the same mounting foam will correct the situation. With its expansion, the gap will disappear by itself.
It is not necessary to assemble in advance the U-shaped design from the extensions. During installation, the elements are still skewed and each will need to be refined on site. It will take more time and effort.
What are extras?
The product is intended for registration of an aperture which was formed after installation of a door. They are completely decorated with door slopes.
Extras on the front door are wooden slats, which increases the width of the box, if it is smaller than the doorway.
There are several types of strips. It is worth knowing about their characteristics in advance in order to correctly select and carry out the facing of the entrance aperture. Installation technology is not complicated. Everyone can take possession of it.
Are they needed?
The question of how much extras are necessary for doors is for the most part individual, but often the trims help to correct the unevenness of the walls, the mismatch between the parameters of the opening and the box. Facing allows you to harmoniously combine the entrance door frame with the platbands.

The building element is designed to form deep slopes. Thanks to them, the design looks complete. It harmoniously fits into the overall interior and complements the design in the apartment.
Extras for entrance doors are made in one color, if possible from the same material as the furniture in the corridor. This nuance plays an important role in the design of the hallway or terrace.
Pros and Cons of Using
The main advantage of using cladding is that door extensions help to increase the door frame in the coverage area. In addition, the elements serve for the design of entrance openings and doors. With their help, possible irregularities of slopes are masked. A big plus is that you can make and install an element of the entrance door group yourself.
Of the minuses of the design, it is possible to single out the fact that if the extension is made of low-quality and inexpensive raw materials, then its service life will be short.
The most common budget option for cladding are MDF slats. Since the decoration is carried out at the entrance doors, where there are temperature differences and the occurrence of dampness depending on the changing weather, the material eventually loses its strength and is deformed.
The main difference between the strips is the raw material from which they are made, and the width of the rails themselves.
Platbands for entrance doors have a different design and, accordingly, characteristics. They are divided into 4 types.
Standard without edge
The standard entrance cladding is also called a simple extension. Such a board has raw edges, so the joints must be covered with platbands. During installation, the straps are connected to each other by means of additional fasteners.

Simple extensions and platbands on the front door are considered to be short-lived, as water vapor can penetrate into them.
Telescopic
The telescopic door trim has an unusual design. It allows installation without additional hardware.

The panels are easily and reliably joined together by means of connecting grooves and a ridge; these are the simplest elements to install.
Combined
This door trim is the most practical and easy to install. Combined are called dobors, which include platbands in their design. They do not require capital fasteners, it is enough to correctly adjust the slats along the length and fix their grooves.

Production material
The facing element of the entrance door group is made of the following materials:

The most common are add-ons and platbands made of MDF. Further in popularity are wood and metal products. The cost of facing materials can be different. The most expensive are special planks made of natural wood.
How to install an extension on the front door?
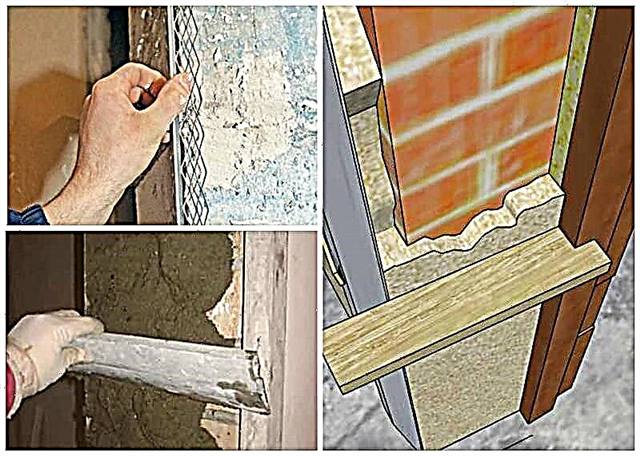
Immediately before installing the panels, it is necessary to carry out preparatory work. First, the walls are cleaned of the remnants of building material.Their surface is leveled with plaster.
Experts recommend using foam for minor wall defects. To warm the input opening, polystyrene foam and mineral wool are used. The material is placed under the box, platbands and extras. This ensures not only heat, but also sound insulation. Installation of platbands can be done after wall decoration with wallpaper or paint.
Necessary tools
To install the front door trim, you will need the following tools:
- electric jigsaw or hacksaw,
- level,
- carpentry pencil
- carpentry hammer made of wood or rubber.

If you install dobors on the front doors with your own hands, then for their fastening you need nails, screws and mounting foam.
Type selection and metering
First, adjust the trims in height. To do this, measure the slopes in the doorway. The greatest difficulty in installing the input panels is caused by doorways with expansion. Here it is important to correctly calculate and saw off everything in accordance with the size of the staff.
The type of input cladding is selected individually. The easiest to install are combined and telescopic extensions. These slats are best protected against moisture and air.
If the strips of a simple type are installed, they must be connected to the middle and edge of the wall using foam and additional fasteners. Between the slope and the rail itself, neat spacers are installed and foam is blown into the shallow space.
It is much easier to mount telescopic extensions. It is enough to bring them to the door frame and fix the grooves. Using an optional mount is optional. The jamb of the wall can be hidden by bars with a special design or entrance platbands.